
In this article, I perform a DIY mini split install in my spray foam attic for moisture and humidity control.
Tools I Used
DIY Mini SplitWall Mounting Bracket
LineGuard 4.5″ 16-Piece Complete LineGuard Cover Set for Ductless Mini Split
Masonry Drill Bit
Magnetic Level
Drill
Step Ladder
Mini Split 5/8 Drain Line to 3/4 PVC Plastic pipe Adapter
Humidity Sensor
Smartthings Hub
Echo Dot
Milwaukee Bi Metal Hole Saw
Matadoor Garage Insulation Kit
Vasco 20″ High Velocity Fan w/ Quick Mount
Spray Foam Caulking Gun
GREAT STUFF PRO Window and Door Foam
DIY Mini Split Install Video Tutorial
There are several things which are difficult to fully explain with words and images, so be sure to check out the video tutorial below.
Introduction
My family and I recently moved into a new house across town from our old house in late 2015.
Our new home contained many energy efficient features such as tankless hot water heater, insulated HVAC ducts, and adequate batt insulation.
Although the insulation adequately protected our living space, the attic reached very high temperatures for most of the year.
As a result, I decided to hire an insulation contractor to install open cell spray foam on the roof line of my unvented attic.

Shortly after, I realized I needed an efficient and affordable solution to reduce high humidity in a spray foam attic.
After many hours of research, I decided to perform a DIY mini split install (my 3rd) to prevent moisture problems in my spray foam attic.
In summary, I cover the following topics in this article:
- Attic Ventilation (Vented Attic vs Unvented Attic)
- Spray Foam Moisture Problems
- Various Options to Reduce Spray Foam Attic Humidity
- DIY Mini Split Install
- Home Automation to Measure & Control High Humidity
Keep in mind, I am NOT an HVAC or home insulation expert.
This article is based on common sense, basic science, and things I’ve learned through research.
Click here to go directly to the DIY Mini Split Installation instructions and skip sections about spray foam attic moisture problems and humidity control.
Traditional Vented Attic
Traditionally, vented attics are the most common way to insulate an attic.
Essentially, allows air to enter the attic via soffit vent holes, circulate, and exit the attic via a ridge vent at the top of the house.
Furthermore, the attic insulation rests on the attic floor.
Ideally, the attic is completely sealed from the rest of the house in order to keep conditioned air within the thermal envelope.
The thermal envelope is the space where condition air (cool or warm air) gets trapped.
In turn, the attic floor (interior ceiling) becomes thermal envelope of the home.
Vented Attic Problems
Obviously, there are many problems with vented attics:
- Energy loss from improper sealing from conditioned space.
- Warm air deposits from bathrooms/kitchen.
- Unconditioned duct work.
- HVAC equipment work hard in vented attics.
The vented attic problems drive the need for an unvented spray foam attic.

Unvented Attic
At present, an unvented spray foam attic is the most common of unvented attics.
Basically, an unvented attic solves the vented attic problems by moving the thermal envelope to the roof line if installed correctly.
In turn, the attic becomes a conditioned space. This reduces energy costs and makes your attic much more comfortable.
As a side note, there are 2 types of spray foam: Open Cell and Closed Cell.
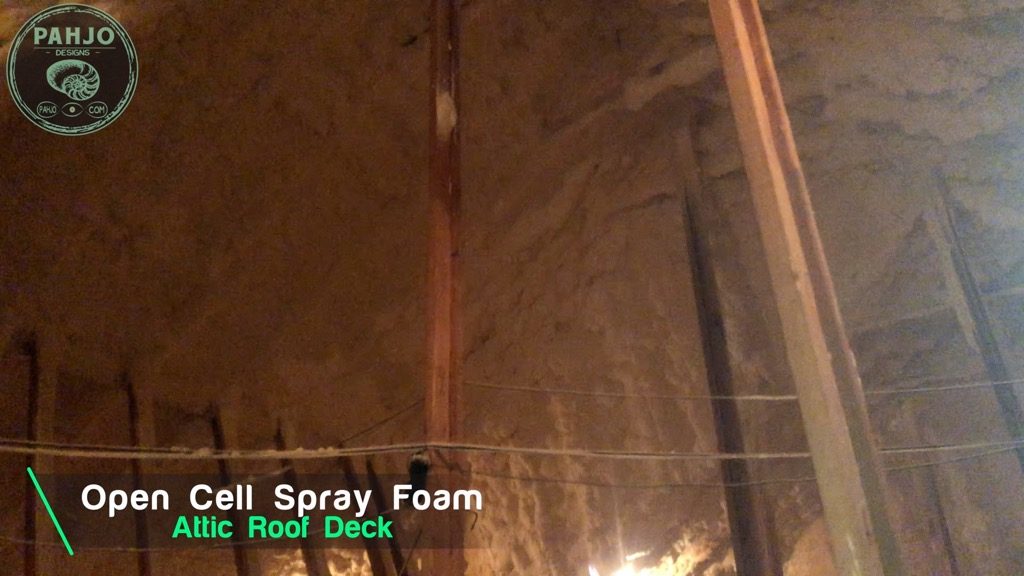
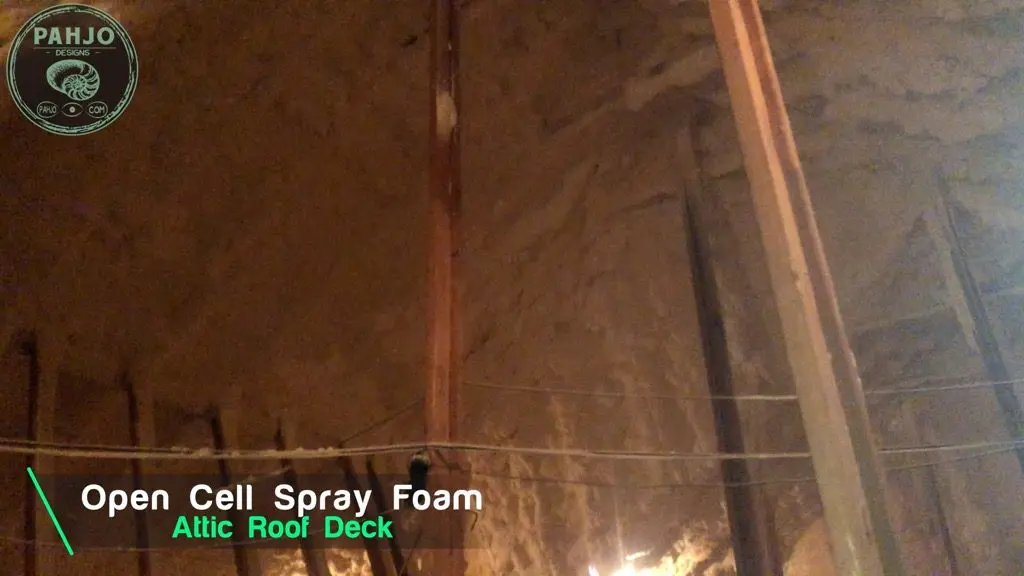
For the purposes of this article, I refer to spray foam as open cell spray foam.
Unvented Attic Problems
This sounds fantastic, right? Well, don’t get too excited just yet.
Ultimately, spray foam restricts air movement through the attic and reduces the natural ventilation.
Furthermore, natural ventilation reduces levels of pollutants inside the home.
As a result, allergens, moisture and other pollutants could build up to dangerous levels and pose health risks
Despite my desire to have an energy efficient home, the health of my family supersedes everything.
Once I learned about this information, my sense of urgency increased to make my attic a safe environment.
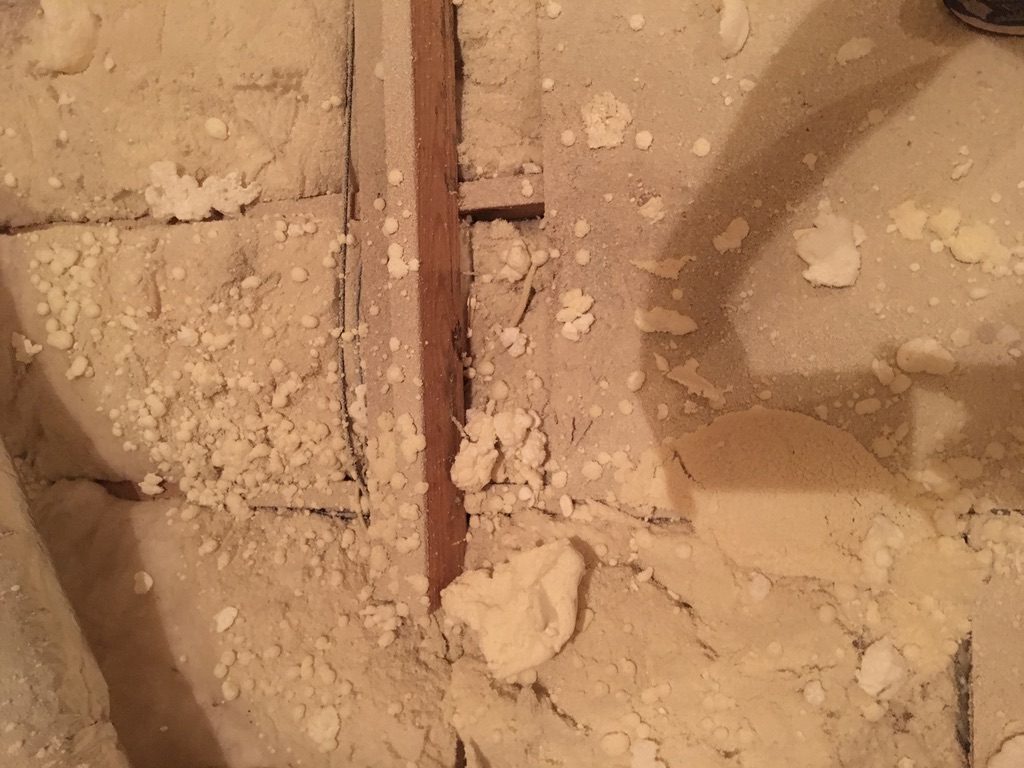
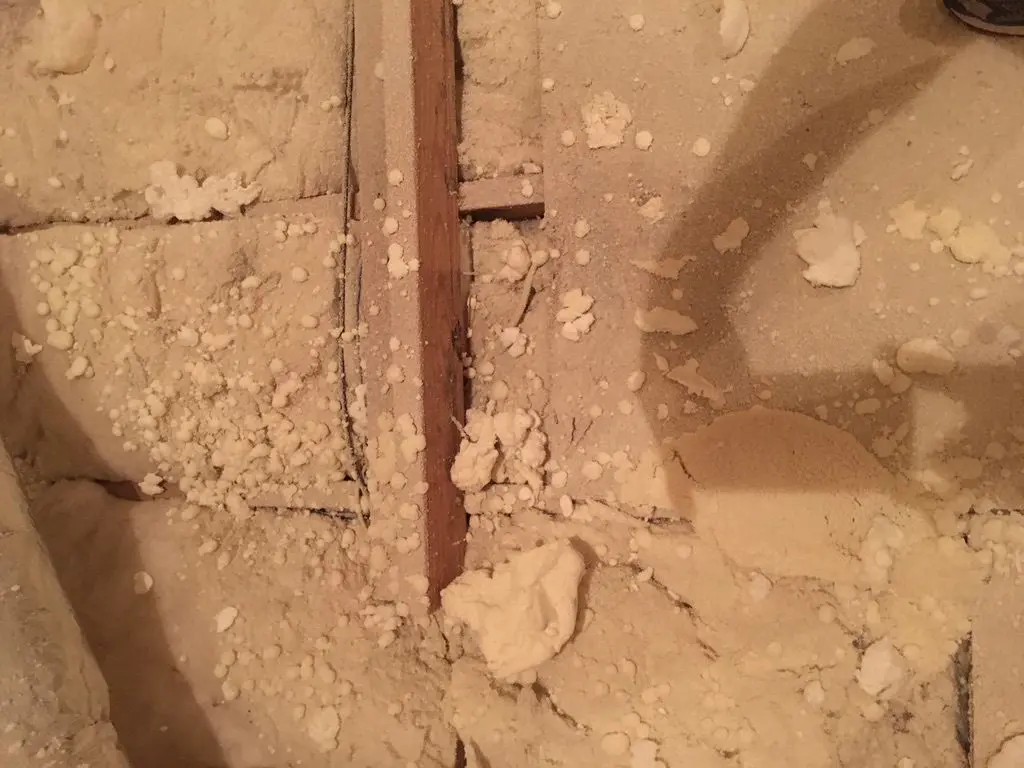
Spray Foam Moisture Problems
Obviously, spray foam moisture problems in humid climates, such as in South Louisiana, concern me.
Essentially, high humidity in spray foam attics introduce many problems. Additionally, it nullifies the advantages of spray foam insulation.
So, important questions came to my mind.
- How should I measure for humidity control?
- How does temperature affect humidity in the air?
- What is the difference between the dew point and humidity?
Ultimately, I need to measure and control humidity and air temperature in my spray foam attic.
Humidity and Air Temperature
There are 2 types of humidity:
- Relative humidity (RH) is the ratio of moisture in the air to the maximum amount of moisture the air can hold.
- In addition, RH varies based on the air temperature and ‘relative’ to the air temperature.
- Absolute humidity measures the amount of water vapor (moisture) in the air regardless of air temperature.
Keep in mind, I refer to Relative Humidity (RH) when I use the term ‘humidity’ in this article.
Air temperature affects humidity in the air. Essentially, the air can hold more moisture as the temperature increases.
So, I accomplish nothing if I control only humidity or only air temperature.
Rather, I need to control relative humidity which includes air temperature.
What if RH and temperature are ideal and I still have moisture problems on surfaces?
Dew Point
Relative humidity (RH) and temperature adequately fulfill my needs to prevent moisture in my spray foam attic.
However, as an isolated measurement, relative humidity may not provide enough information to prevent moisture.
Unlike relative humidity, dew point is a single, more meaningful measurement of humidity.
Dew are droplets of water that form on surfaces when atmospheric vapor condenses.
So, how does dew form?
First, the air in our world contains water.
Furthermore, the amount of water molecules in the air determine the temperature at which the water vapor enters the liquid phase (Dew Point).
In addition, this happens at the surface level.
The dew point is the atmospheric temperature (varying according to pressure and humidity) below which water droplets begin to condense and dew can form.
Examples of dew point include: condensation on windows in a home, morning dew on cars and grass, and canned cold drinks.
How to Calculate Dew Point
If you want to learn more about the dew point and your environment, visit this dew point calculator.
Essentially, this calculator allows you to adjust temperature, relative humidity, and dew point to see how each impact one another.
Spray Foam Mold Problems
So, how does mold form? What conditions facilitate mold growth?
First, mold requires 4 things to grow:
- Mold Spores
- Mold Food
- Ideal Temperature
- Ideal Moisture
Mold grows on any organic material such as wood, paper, carpet, cloth, insulation, and more.
In addition, mold eats whatever it is growing on and produces toxins which may pose health risks for humans.
When warm air contacts cold surfaces, condensation occurs because the cool air cannot hold as much moisture.
As a result, condensation provides the ideal condition for mold growth.
Ultimately, mold and mildew grow when:
- Relative Humidity exceeds roughly 65%.
- Air temperature exceeds roughly 75 degrees Fahrenheit.
The chart below shows the ideal air temperature. Basically, any temperature between 65 to 75 degrees.

The chart below represents the ideal relative humidity.

Attic Spray Foam Precautions
A spray foam professional provides valuable information to avoid problems with spray foam attics.
Keep in mind, the information in this article focuses on spray foam installed in an existing home.
Unfortunately, some spray foam professionals feel it’s not their responsibility to address things beyond insulation such as HVAC resizing, etc..
Homeowner Responsibility
Essentially, the majority of the responsibility falls on the homeowner.
Most often, the homeowner doesn’t know enough to ask the right questions. As a result, the project fails.
The spray foam professional receives negative reviews. Moreover, the homeowner must pursue legal action to fix the issue.
Ultimately, the spray foam contractor should address existing attic insulation, unvented spaces under the roof (such as a garage), and attic ventilation.
Furthermore, an HVAC professional familiar with spray foam should inspect the existing HVAC system.
However, corner cases exist such as in my situation. Even though I hired a professional, he did not address everything.
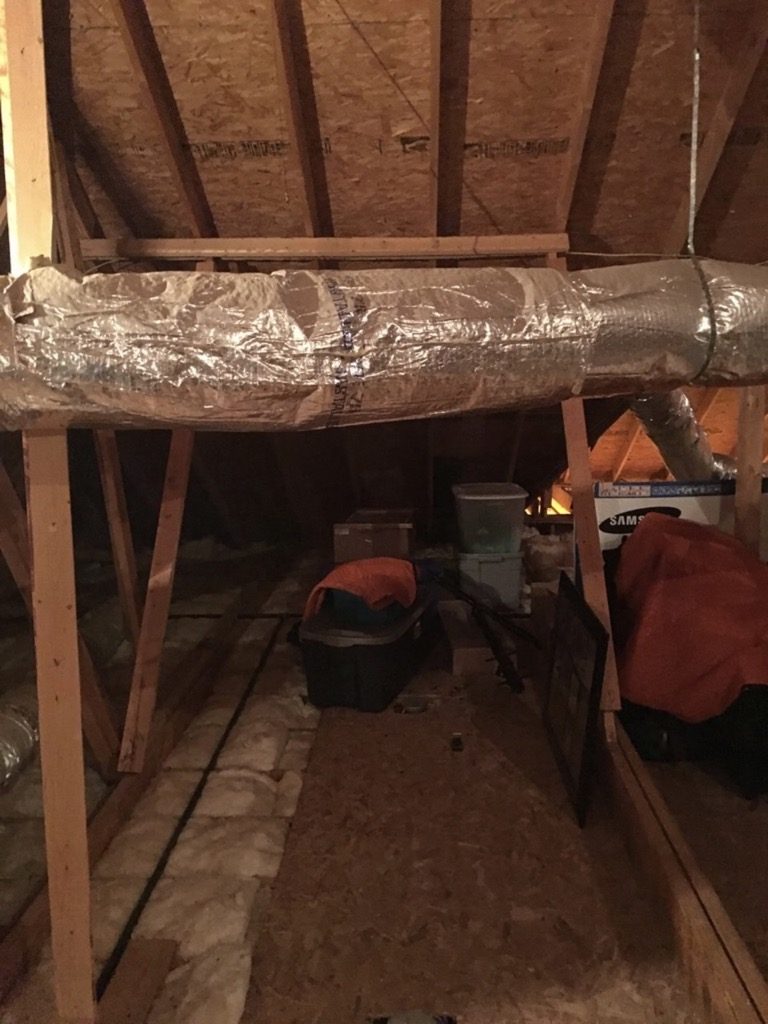
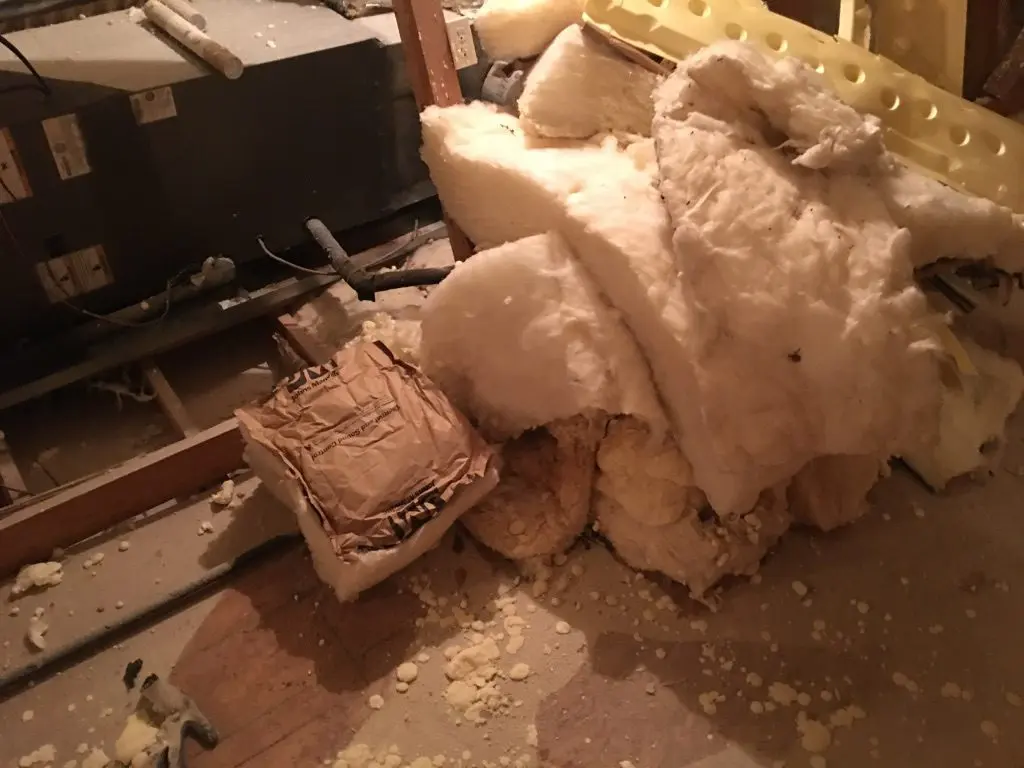
Remove Attic Floor Insulation in Spray Foam Attic
First, remove any existing insulation on the attic floor.
Essentially, this allows air from the house to enter the conditioned attic.
If not removed, trapped attic air between 2 thermal envelopes (roof line and attic floor) produces an unfavorable environment.

Unvented Areas Under Roof
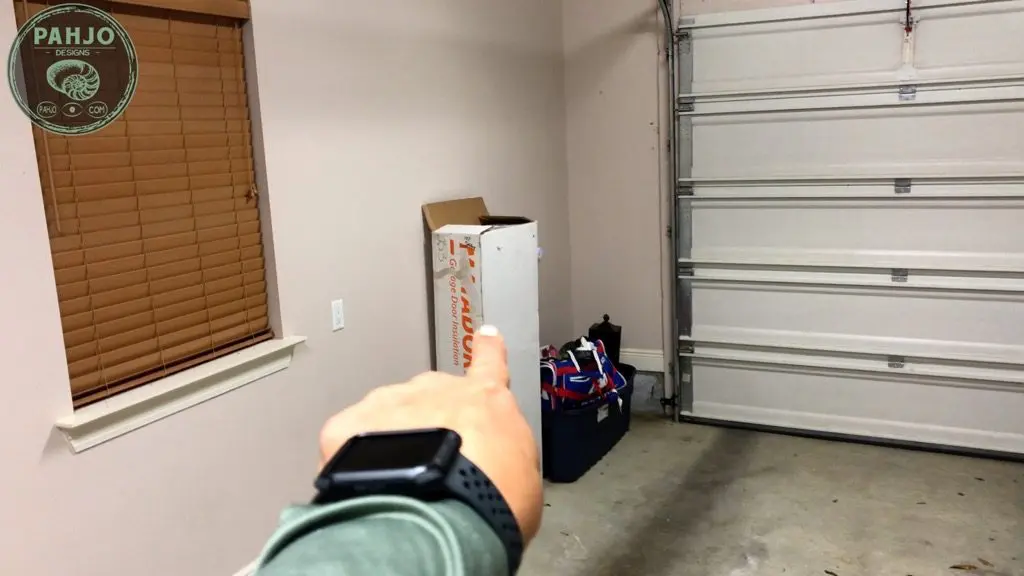
I have a garage under my roof line.
When the garage door opens, warm or cold air rushes into my garage and into the conditioned attic.
Furthermore, most garage doors are not well insulated such as mine.
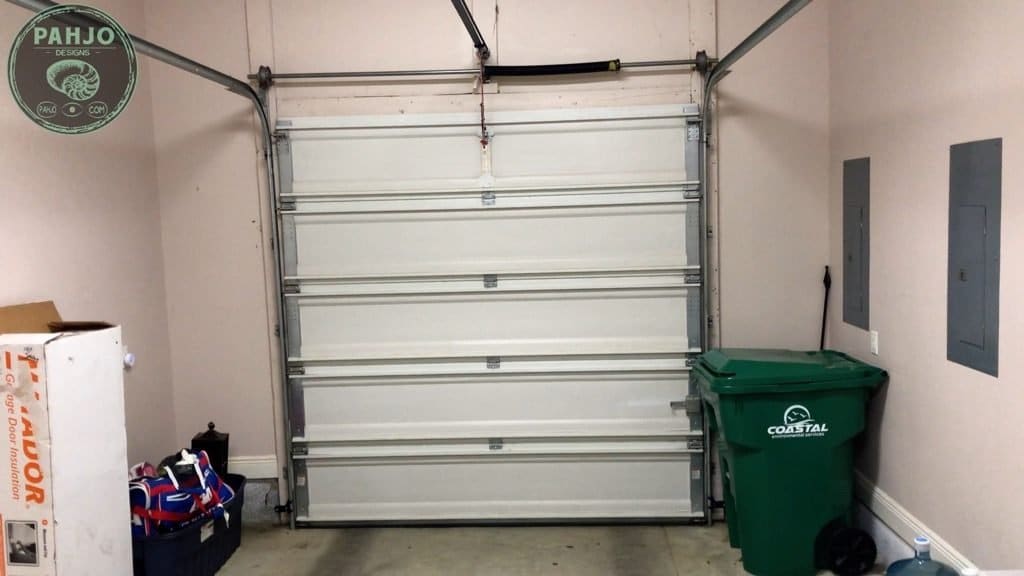

In turn, the garage temperature differs greatly from the temperature in my home.
Ultimately, there are many options to address this issue. In turn, I encourage you to speak to a professional about which option(s) is best for your situation.
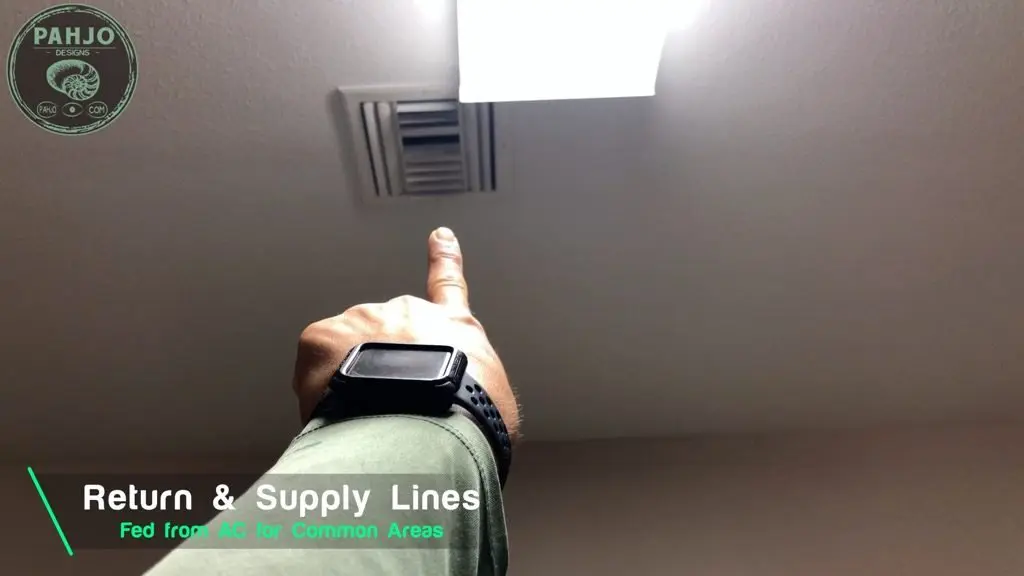
- Install an HVAC return/supply in the garage (I have both)
- Insulate Garage Door (I plan to do in the near future)
- Isolate attic area above garage from the rest of the attic
- Leave insulation on the attic floor above the garage
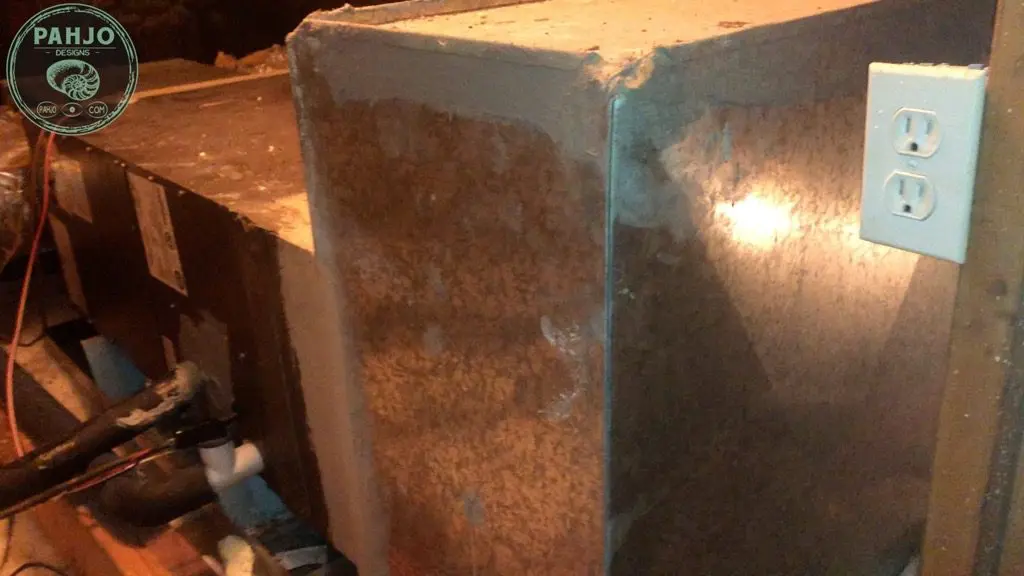
As a quick side note, I built a rigid foam box to go over my attic access door in my garage. This helps tremendously.
I have a return in my garage which is connected to the 4 ton unit for my common areas in my home.


In addition, I have 2 supply lines in my garage.


The garage insulation kit I purchased 18 months ago currently resides on the floor.
Ultimately, I plan to install this in the very near future. :)

Essentially, I have everything I need to remove moist air from my garage, introduce conditioned air, and prevent unconditioned air from entering as much as possible.
HVAC Sizing after Spray Foam
The HVAC system plays an important role in a spray foam attic installation.
Often times, the spray foam changes the HVAC requirements. In turn, the existing HVAC system requirements are reduced by 30% or more.
As a result, the oversized HVAC system short cycles which shortens the life of the compressor and the unit.
HVAC systems cool the house first and then dehumidify the conditioned space.
If the HVAC system doesn’t run for an adequate amount of time, it will not reach the dehumidification stage.
Oversized equipment on the heating side leads to a loss in efficiency. Conversely, oversizing on the cooling side results in moisture problems.
In summary, an HVAC professional performs a variety of tests and makes recommendations based on the results.


Spray Foam Attic Humidity Control
After hours of research, there are 3 viable options for my situation to reduce high humidity in a spray foam attic.
Remember, controlling air temperature and relative humidity prevents condensation and mold.
HVAC Attic Supply Line
This option consists of adding a supply line to blow cool or hot air into the spray foam attic.
However, adding an HVAC supply line in attic doesn’t remove air or humidity.
Rather, it simply adds air which creates positive pressure.
Additionally, it may cause the HVAC system to become unbalanced.
Keep in mind, HVAC professionals design systems based on many factors.
In my opinion, call an HVAC professional well versed in spray foam for guidance.
Attic Dehumidifier
Essentially, this option accomplishes the opposite of the HVAC supply option.
A dehumidifier removes humidity, but doesn’t control air temperature.
DIY Mini Split Install in Spray Foam Attic
Ultimately, a DIY mini split in spray foam attic works best for relative humidity control in my situation.
A ductless mini split heat pump and AC not only adds conditioned air, but also removes moist air (dehumidifies).
Also, I am familiar with a DIY mini split installations as this is the 3rd mini split installation.
I installed a MRCOOL DIY mini split in my workshop and my home office.

Obviously, I feel comfortable with the reliability, warranty, and installation of MRCOOL DIY mini split systems.


Monitor Relative Humidity in Spray Foam Attic
In order to reduce high humidity in my spray foam attic, I need to gather data.
First, I need monitor into the RH and temperature in my attic and gather data points over time..
Additionally, I need data points over a period of time to know whether or not the MRCOOL DIY mini split system works.
Since I already have a Samsung SmartThings Controller, I decided to add a temperature and relative humidity sensor.
Ultimately, I bought the sensor in the picture and bought a different type of sensor in order to accommodate for device inconsistencies.
I’m glad I bought 2 different types of sensors because the humidity sensor in the picture below is no longer for sale on Amazon.
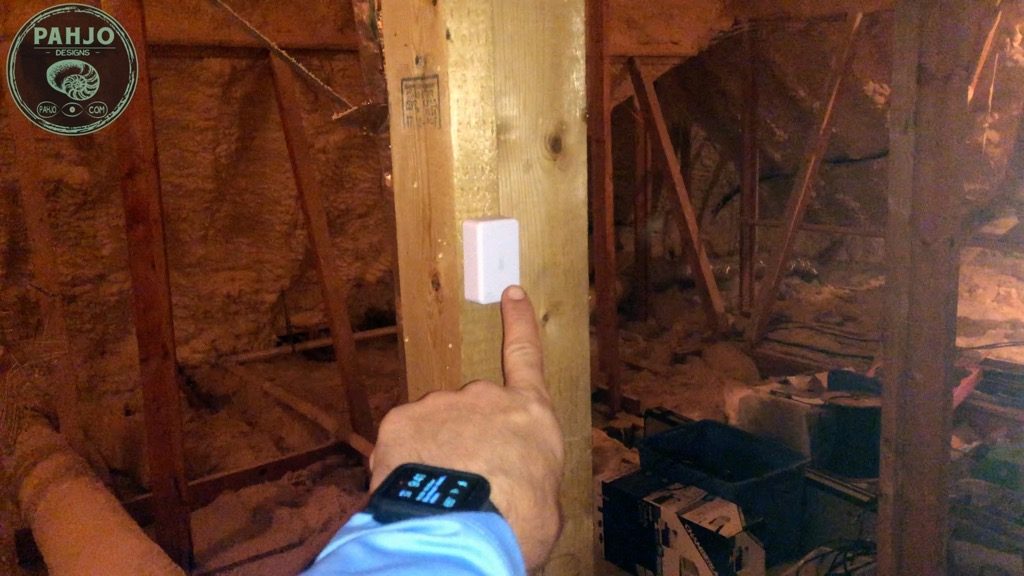

Basically, the sensor takes a snapshot every hour & with any fluctuation of relative humidity and temperature.
Furthermore, I setup alarms to notify me via text message if the RH exceeds 65% or if the temperature exceeds 78 degrees.
Each week, I export the data into excel to product charts like the one below. More on this later down below.

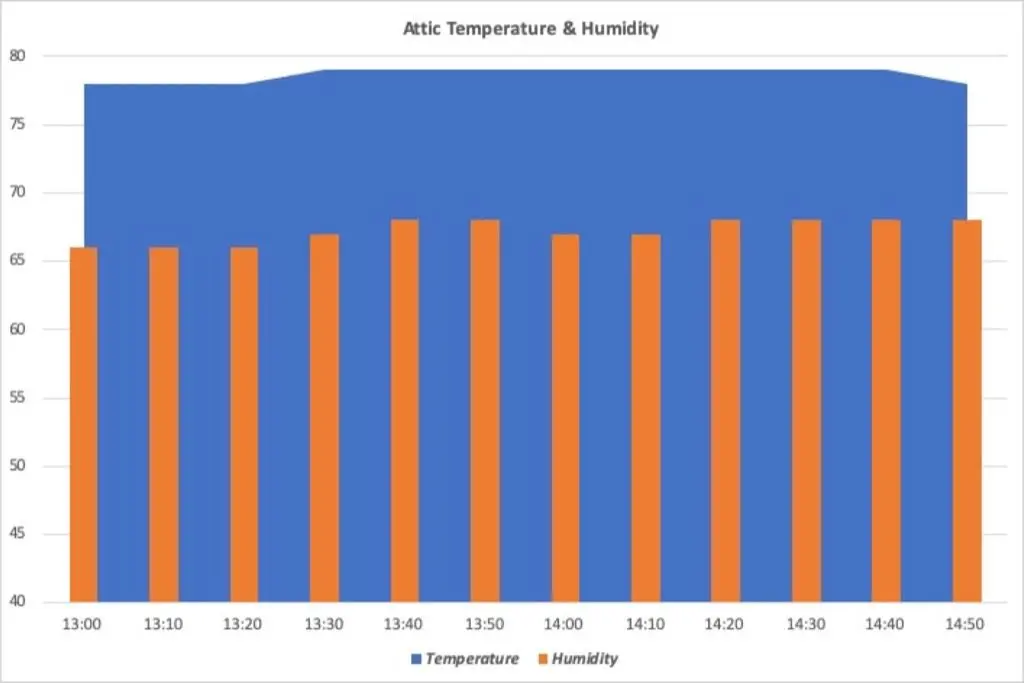
Also, the chart above depicts 1 hour and 50 minutes of data on April 21, 2019 before I installed the MRCOOL ductless mini split.
MRCOOL DIY Mini Split Attic Installation
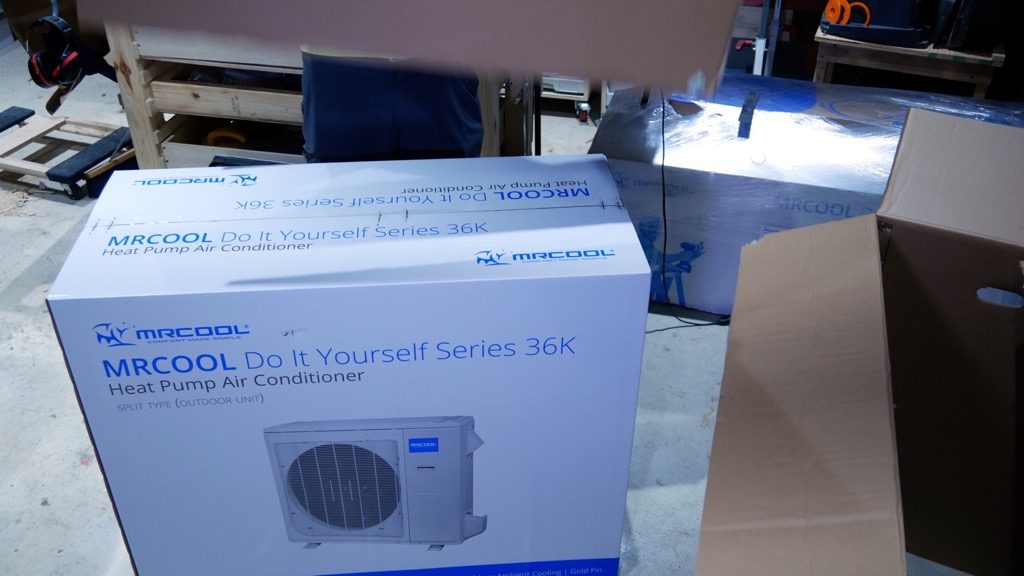
In this project, I installed the MRCOOL 36K DIY Ductless Mini Split air conditioner and heat pump for spray foam attic humidity control & to prevent moisture problems.
As I mentioned previously, please visit my MRCOOL DIY mini split installation blog post and instructional video for normal mini split installation instructions.
In addition, the DIY mini split solves spray foam attic moisture problems by controlling air temperature and relative humidity.
MRCOOL DIY Mini Split Sizing
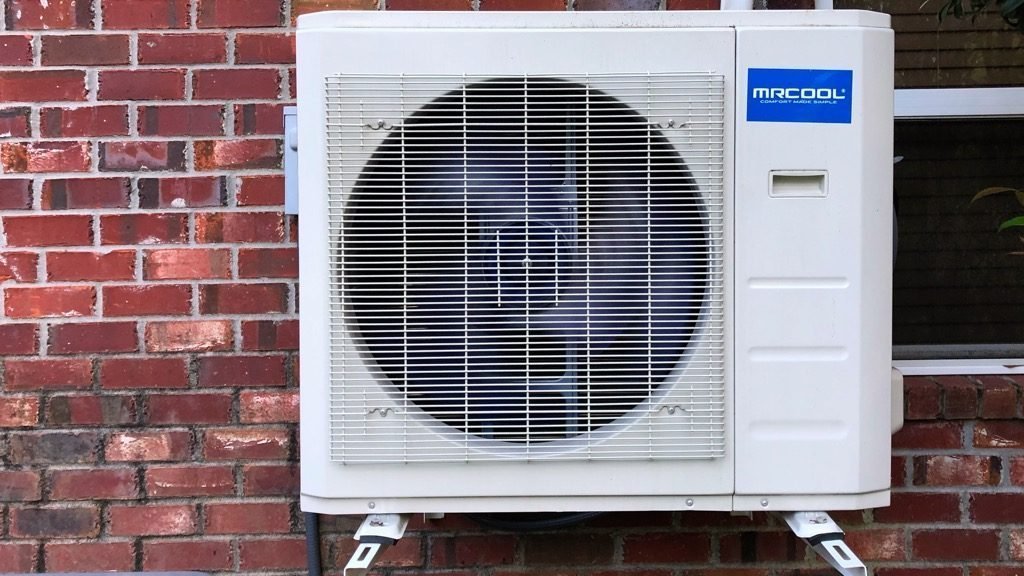
In the past, I installed 2 MRCOOL DIY 18K mini split systems as shown below.
These 2 units function properly for the rooms they serve.

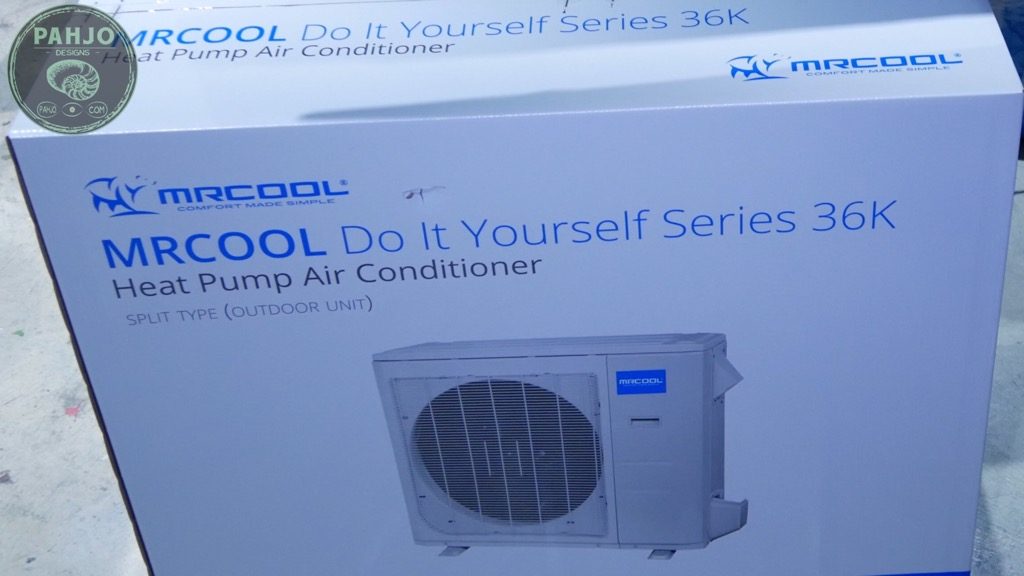
The MRCOOL 36K is the largest MRCOOL DIY model available.
In addition, the 16 seer MRCOOL DIY 36k has a cooling capacity of 34400 btu and a heating capacity of 36000 btu.
As a result, the normal sizing recommendations don’t apply to this particular situation. My attic is fairly large with a high roof line and roughly 3000 square feet.
According to MRCOOL, this unit covers 1,500 square feet as a general rule of thumb.
Undersized Mini Split
Obviously, I realize this undersized ductless mini split may not completely cool or heat my attic.
I am not concerned for a few reasons.
First, I hired an HVAC professional to perform multiple pressure/load tests on my existing HVAC units as well as this DIY mini split.
As a reminder, I’m not an HVAC professional. My apologies in advance if the name of the HVAC tests are incorrect.
The HVAC professional confirmed nothing needs to change and provided the results from his expensive test equipment.
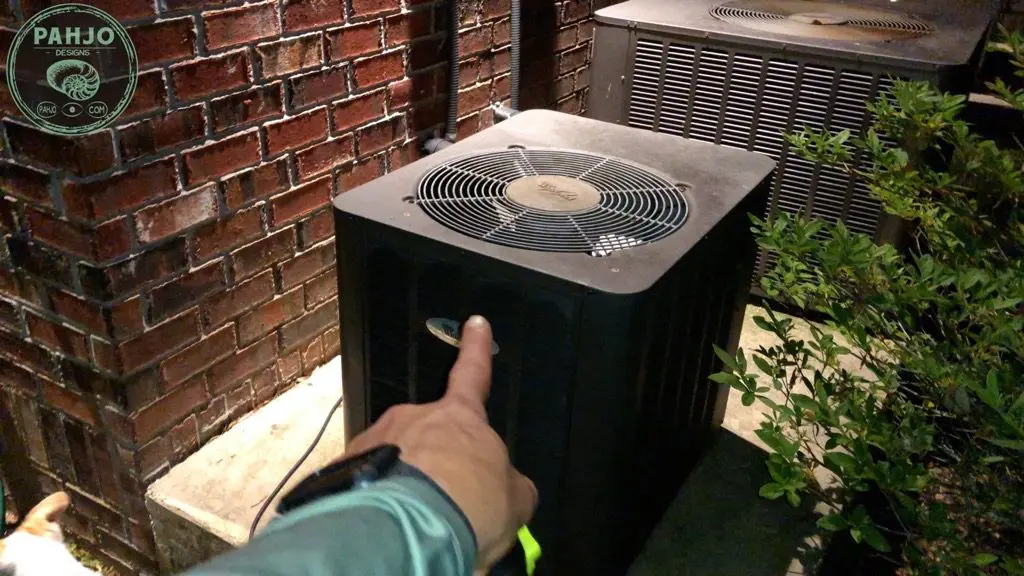
I have a 4 ton unit for my common areas, a 4 ton unit for my bedrooms, and a 1.5 ton unit for my loft.
Since I removed most of the attic floor insulation, conditioned air leaks into my attic from each of my HVAC units.
Additionally, the spray foam sealed the top of my attic air tight. Therefore, the attic holds the leaked condition air very well.
Essentially, the condition air leakage from the living areas in my home makes up for the undersized DIY mini split.
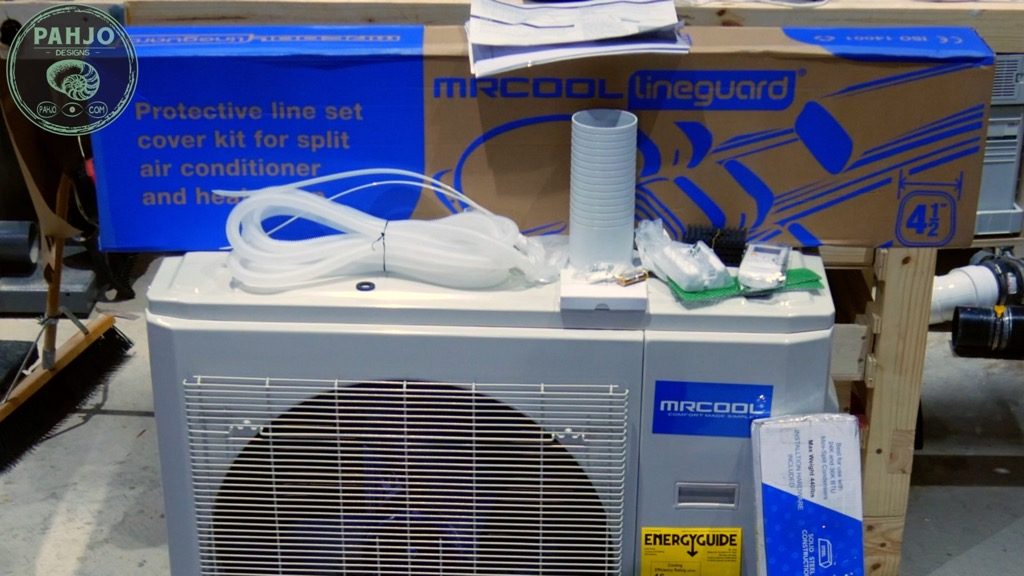
DIY Mini Split Accessories
First, my DIY mini split included the following accessories:
- Mounting Plate
- Wall Sleeve Insert
- Wall Sleeve Cap
- Rubber Pads
- Clip Anchor
- Mounting Plate Fixing Screw
- Seal
- Drain Joint
- Drain Hose
- Neoprene Putty to Seal Access Hole
- Air Freshening Filter
- Smart HVAC Controller
- Amazon Alexa & Google Assistant (Not Included)

In addition to the included accessories and the tools I used (listed at top of this article), I also recommend a few mini split accessories.
First, I encourage you to purchase your DIY mini split from amazon. Amazon has the easiest process for returns if the item is damaged during shipping.
Next, I recommend to purchase the lineguard set to cover the lines outside your home or garage.
Essentially, the mini split line guard protects your refrigerant lines and makes it look professional.
Additionally, I recommend the mini split condenser wall mount bracket.
Obviously, make sure you plan to mount the mini split on the wall before purchasing this item.
I painted my line set the same color as the brick to reduce visibility.
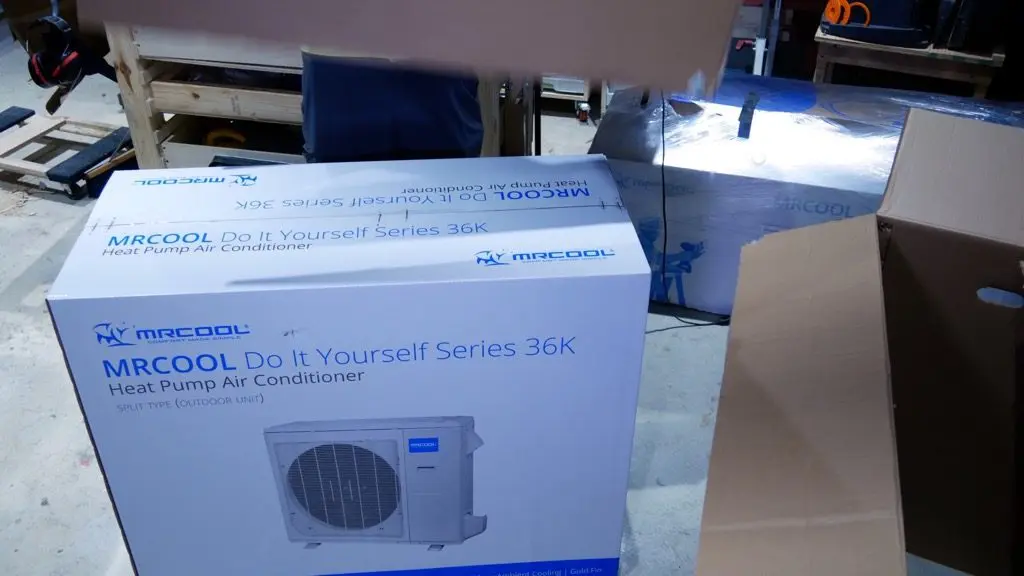
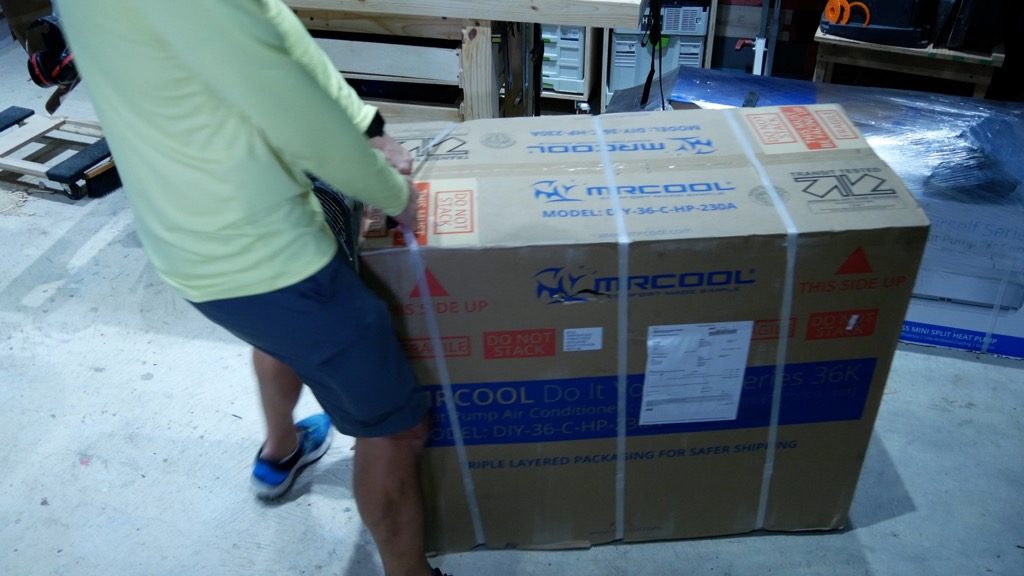
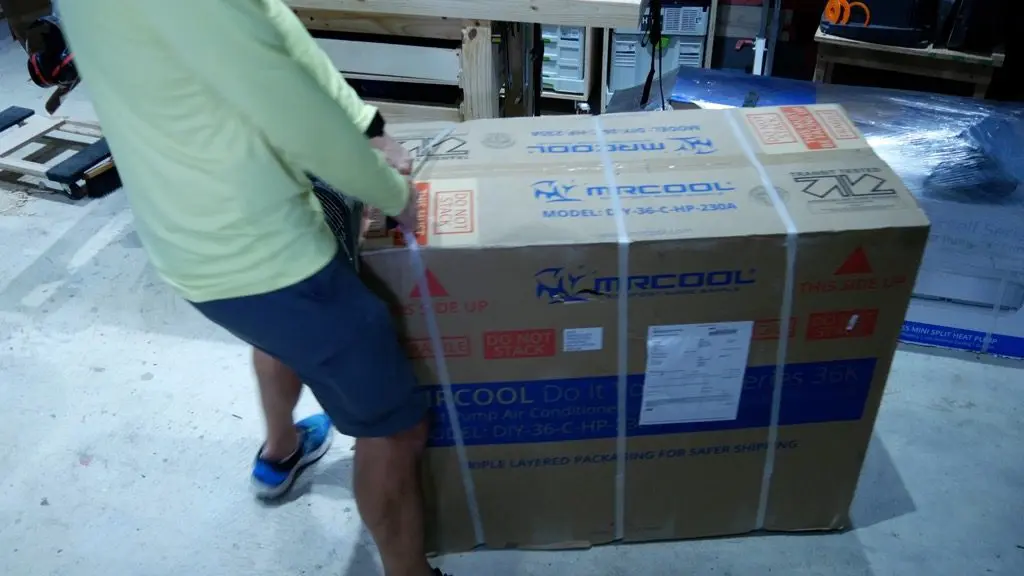
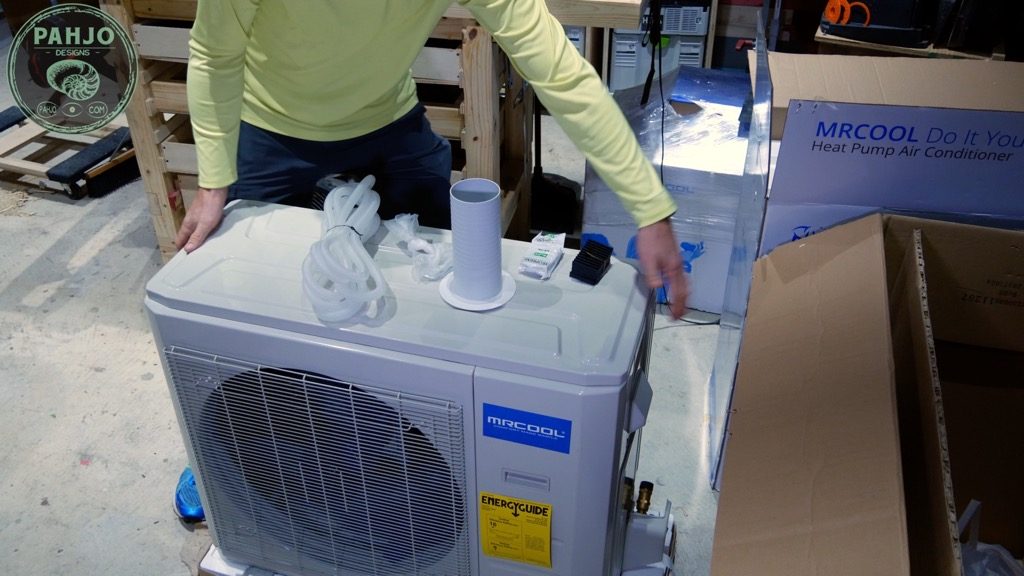
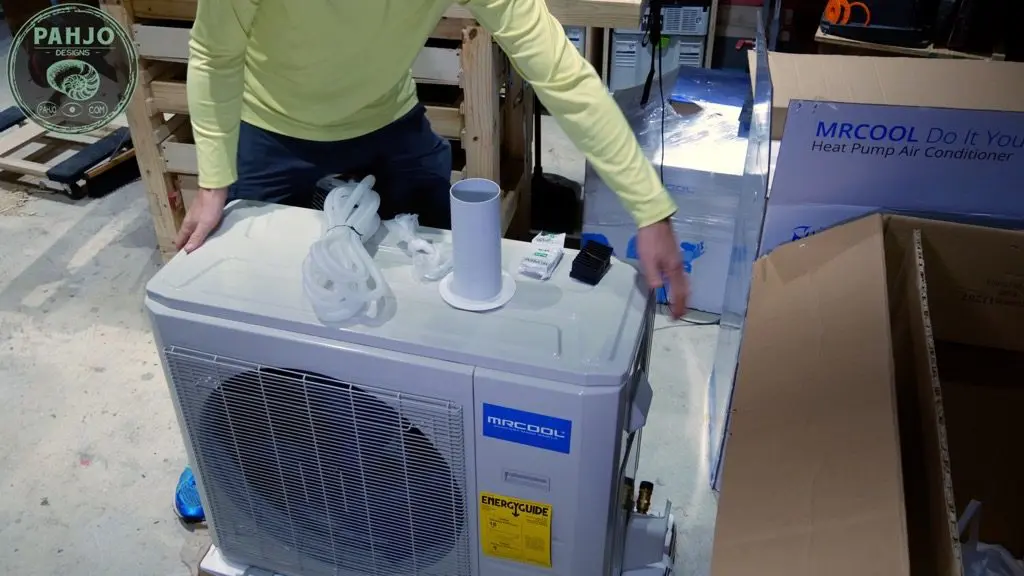
MRCOOL DIY 36K Mini Split Unboxing
The MRCOOL DIY 36,000 BTU mini split arrived in 4 boxes and packaged very well.
First, the outside condenser unit was packaged in a large box with 2 layers.


Next, I removed the accessories from the 2nd box.
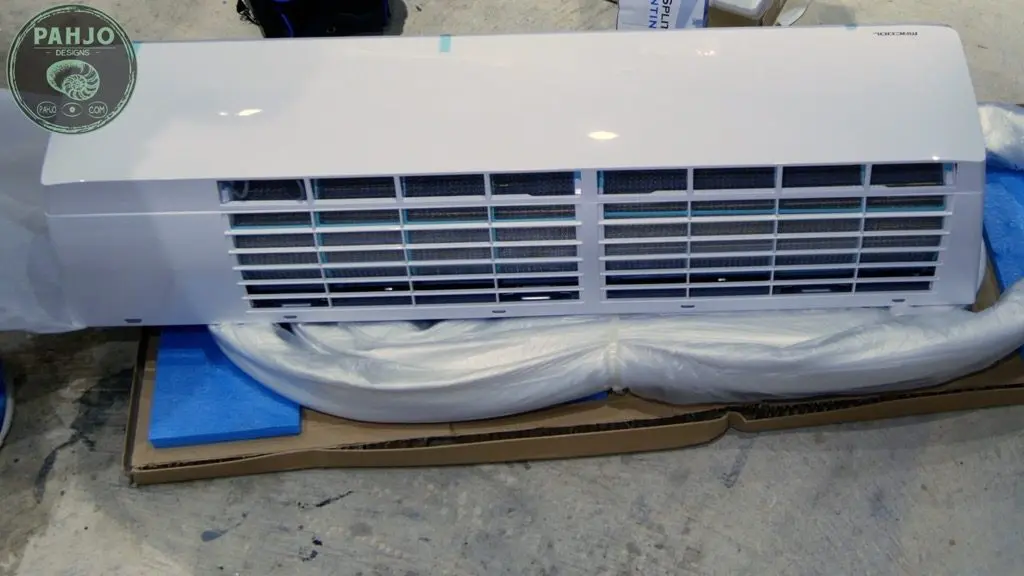
Then, I removed the inside air handler from the third box.
The stiff foaming in the boxes provide stability and protection for the box and the contents within the box.


Finally, the fourth and final box contained the mounting bracket for the outside condenser.


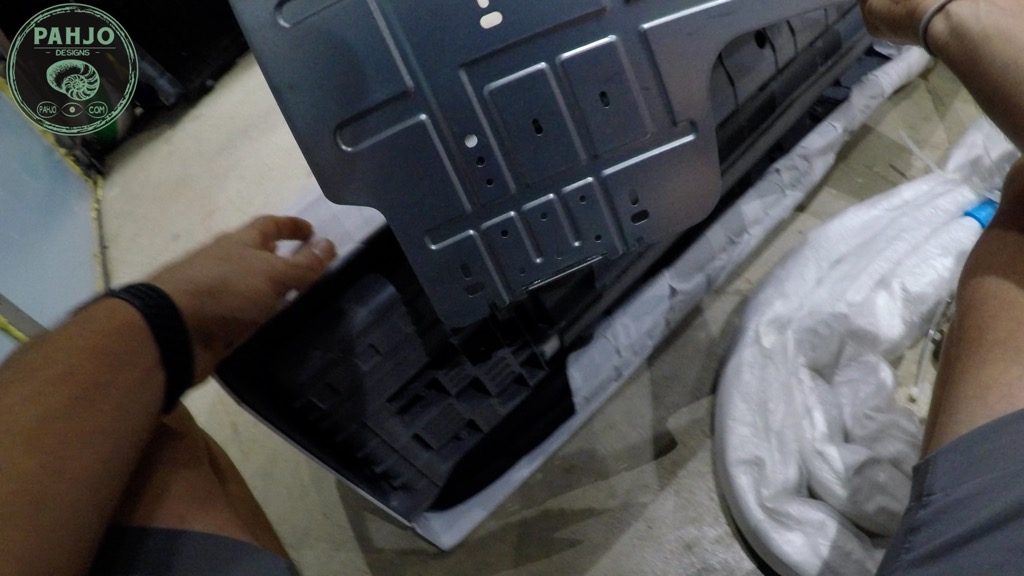
Mini Split Indoor Unit Installation
First, unscrew the single screw on the rear of the indoor unit to release the wall mounting plate.

Next, I located the cardboard wall template included with the MRCOOL DIY mini split.
Then, I chose a suitable installation location to mount the indoor unit.
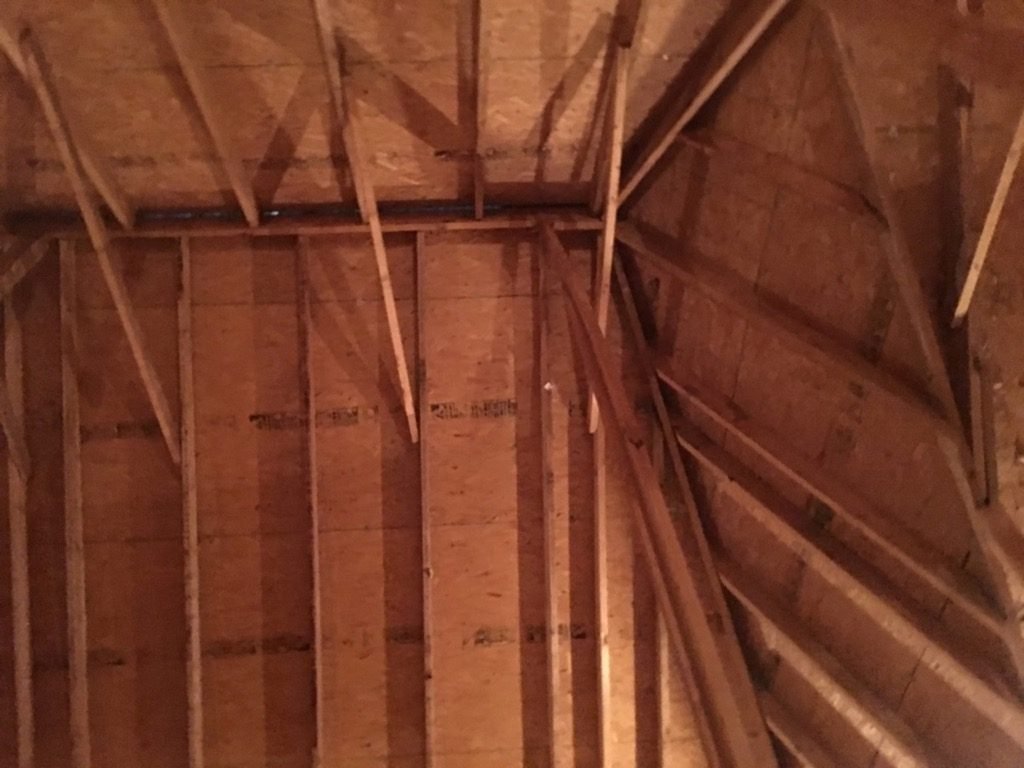
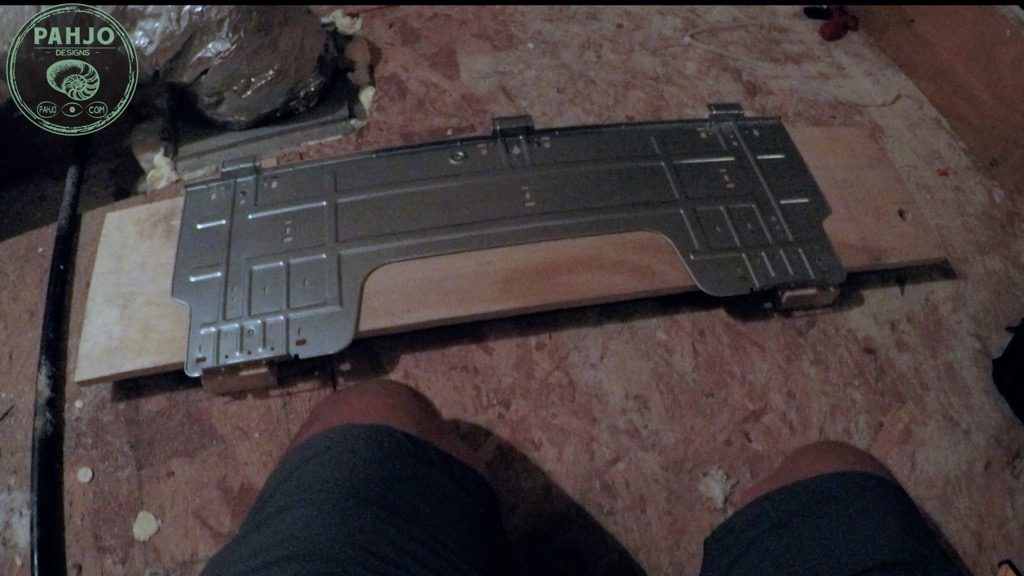
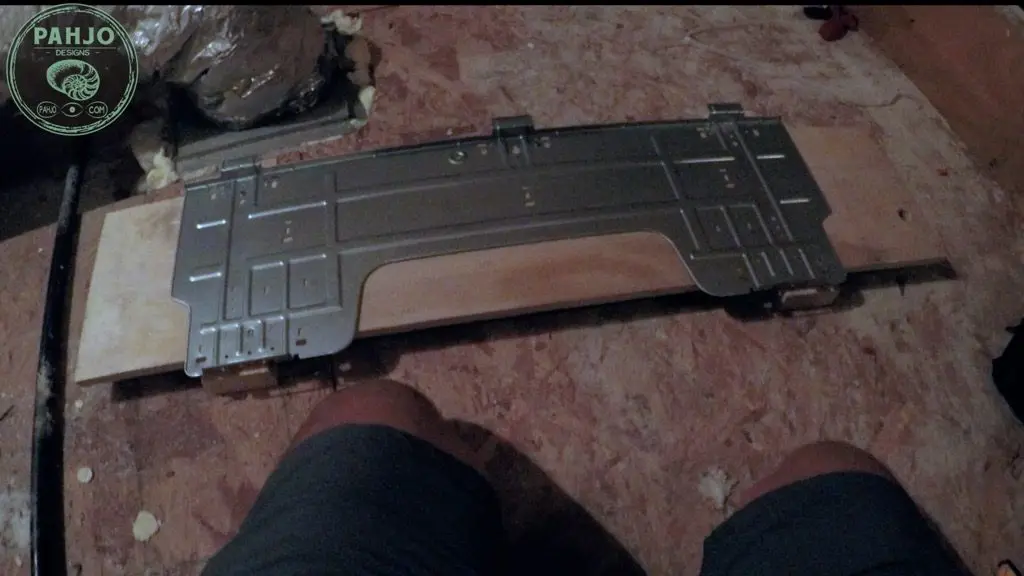
I installed this mini split in the attic which has no flat walls.
Consequently, I secured the mounting plate to a scrap piece of 1×12.
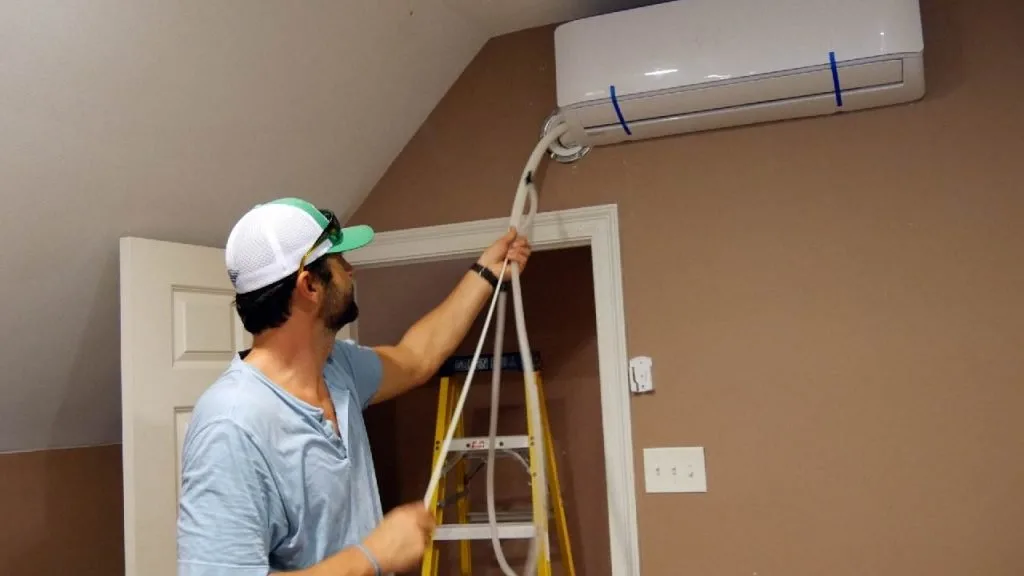
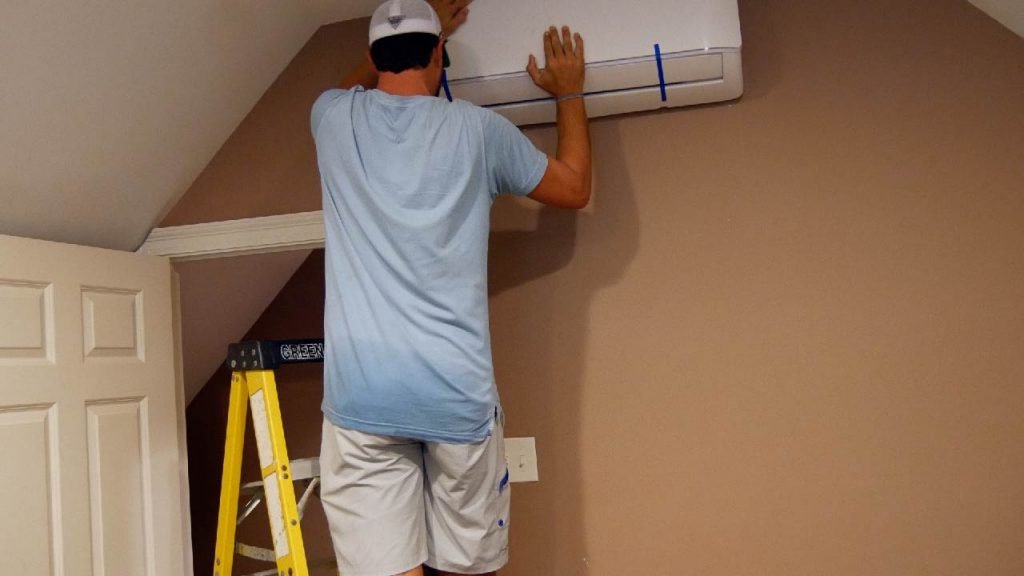
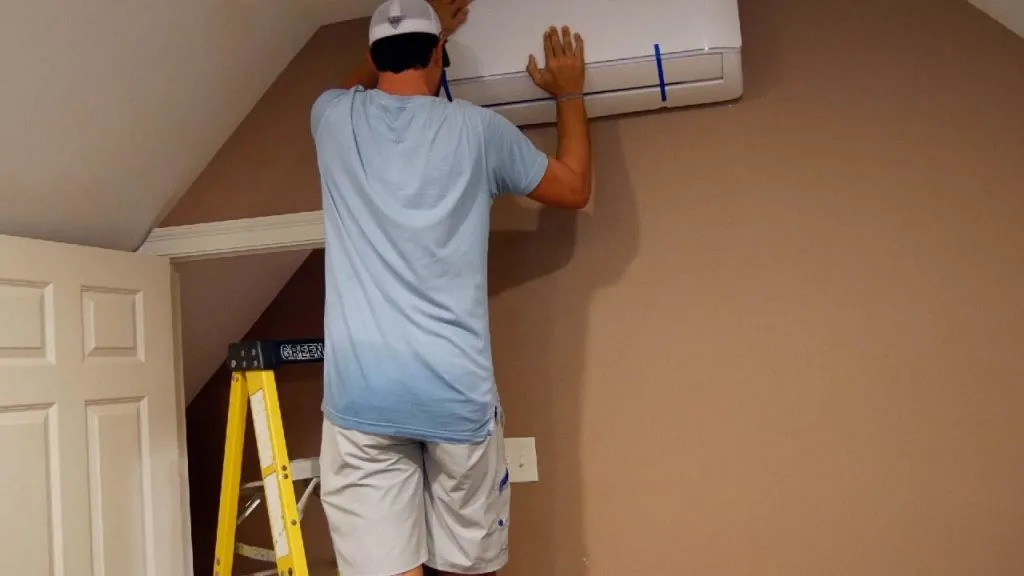
Also, I performed a similar procedure to mount the wall plate in my previous DIY mini split install as depicted below.

As a side note, I chose the location in my attic above my garage for 3 reasons.
- The majority of the warm air enters my attic from the garage.
- This was the best location due to the length of the refrigerant lines.
- The HVAC unit for my main home is located near this area which makes my electrical breaker box more accessible
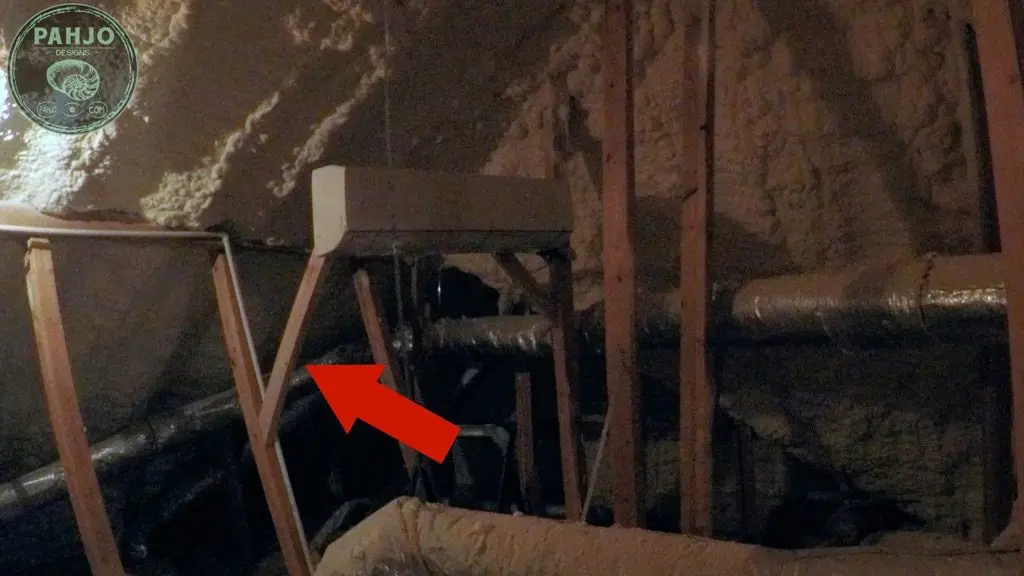
I attached 1 2×4 roughly 40″ long to an attic stud with stainless steel 3″ screws. The 2×4 rests 7′ high and parallel to the attic floor.
Next, I attached another 2×4 at a 45 degree angle to support the parallel 2×4.
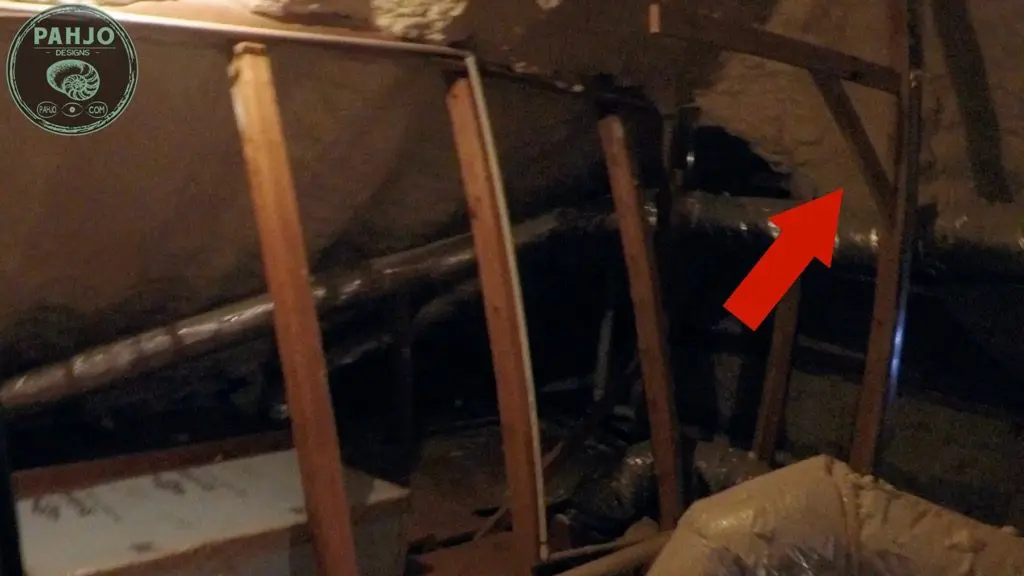
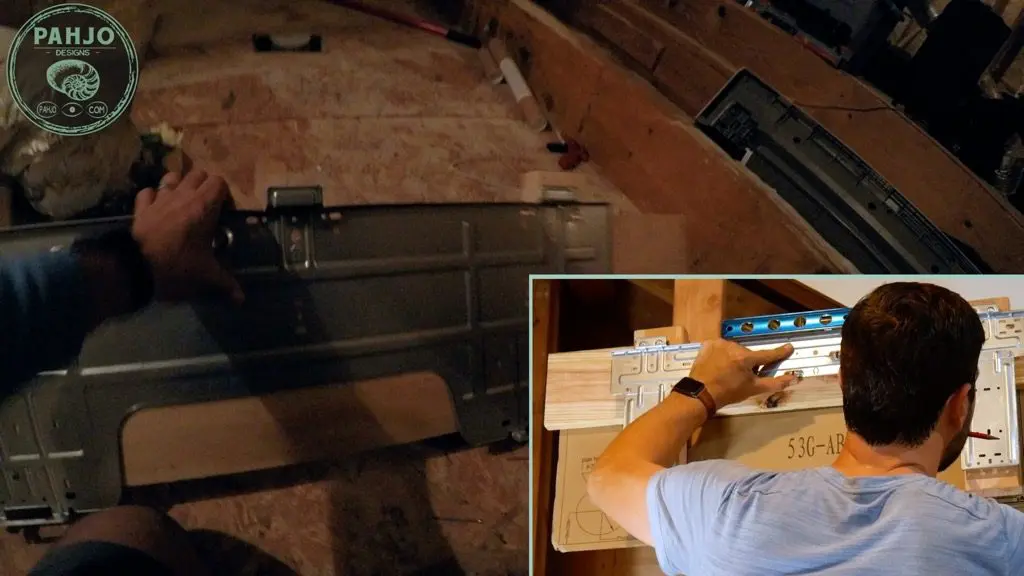
Attach Indoor Air Handler to Wall Mounting Plate
Once I installed the first 2 2x4s, I used another 2×4 cut at 45 degree angles on both ends to secure the parallel 2×4 from the rear.
Finally, I secured the mounting plate to the parallel 2×4 using 2″ screws and verified it was level with my magnetic level.
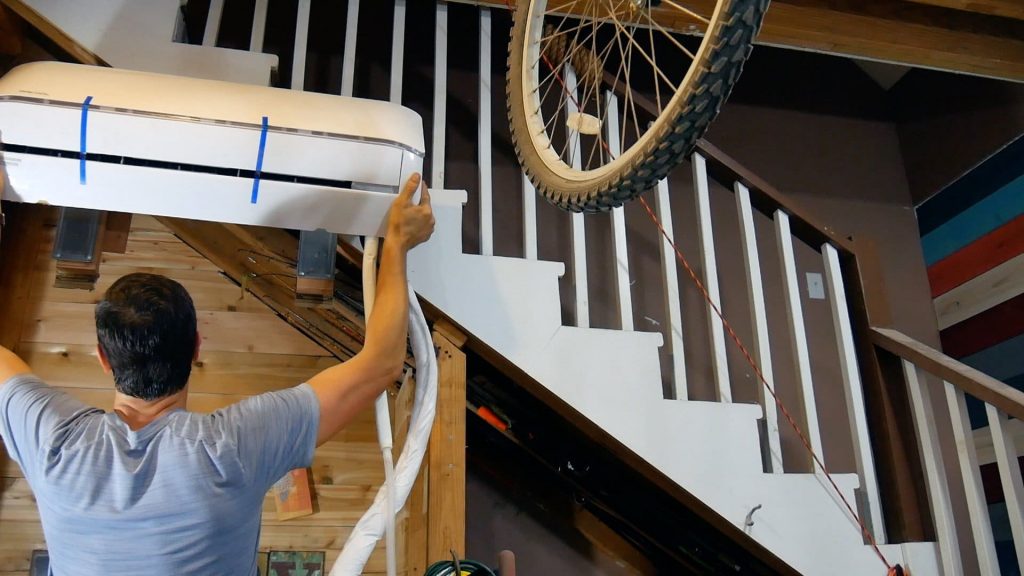
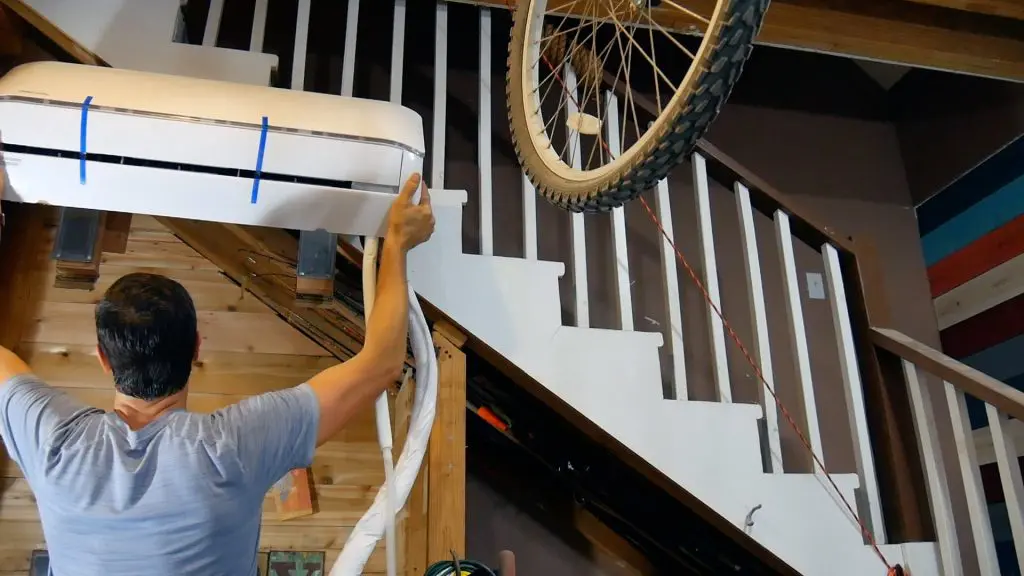
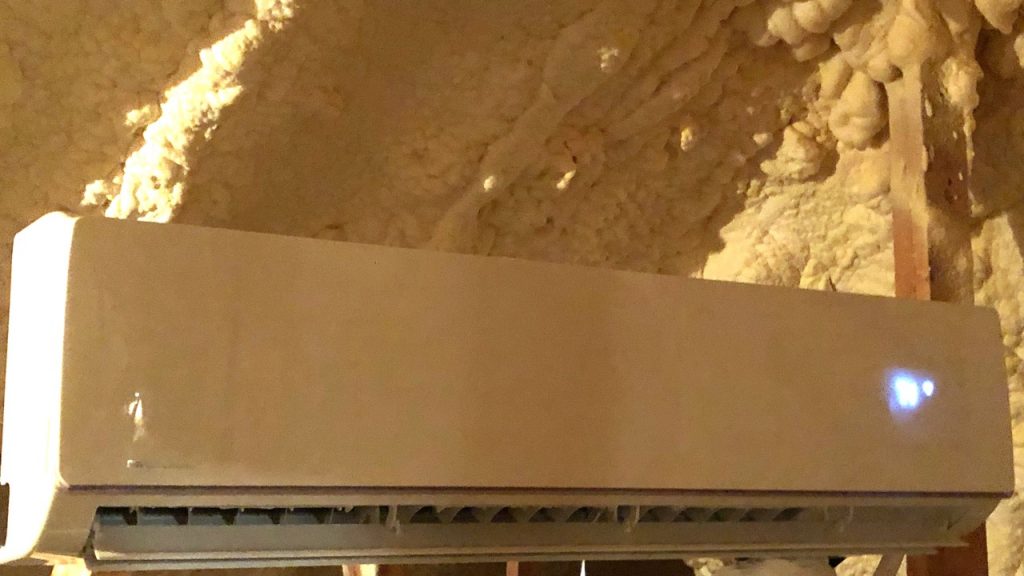
I lifted the DIY mini split indoor unit and placed it on the mounting plate.

Obviously, I did not use the 3.5″ hole saw for this DIY mini split install because the indoor unit does not rest on a flat wall.
However, most installations, such as the one for my home office in the picture below, do rest on a wall.
Assemble Mini Condenser Mounting Bracket
After I mounted the mini split indoor air handler, my focus shifted to the outside condenser unit.
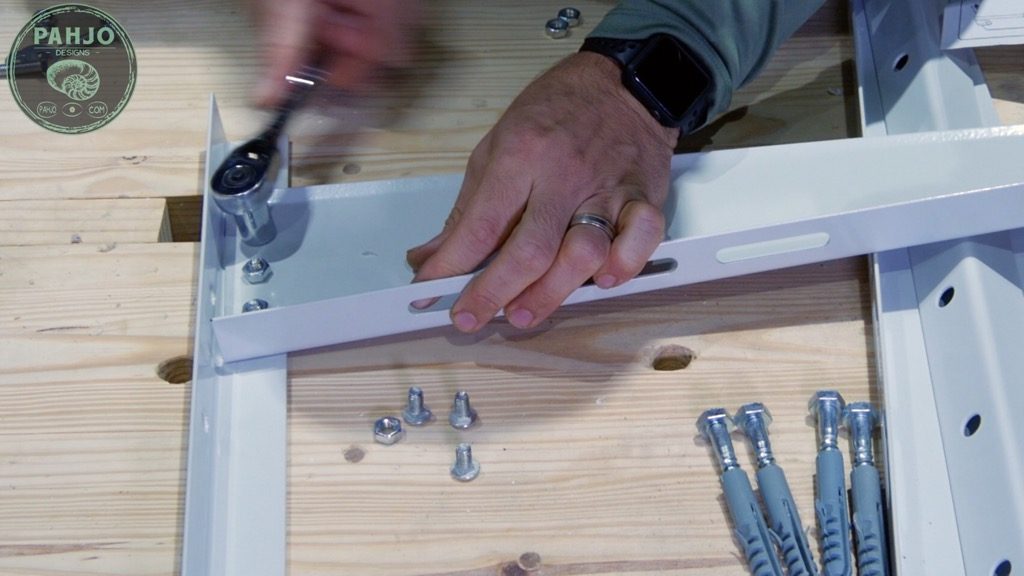
First, I assembled the mini split condenser mounting bracket.
The mini split condenser bracket package contained the following:
- 2 extension arms
- 2 vertical pieces
- Nuts/Bolts (4 of each) to secure the arm to the vertical pieces
- Nuts/Bolts (4 of each) to secure the mini split to the extension arm
- Anchors/Bolts (4 of each) to secure the vertical pieces to the surface
- Instructions
Ultimately, the mini split condenser mounting bracket instructions provide clear direction.
I used the provided nuts and bolts to secure the 2 arm extensions to each of the vertical pieces.

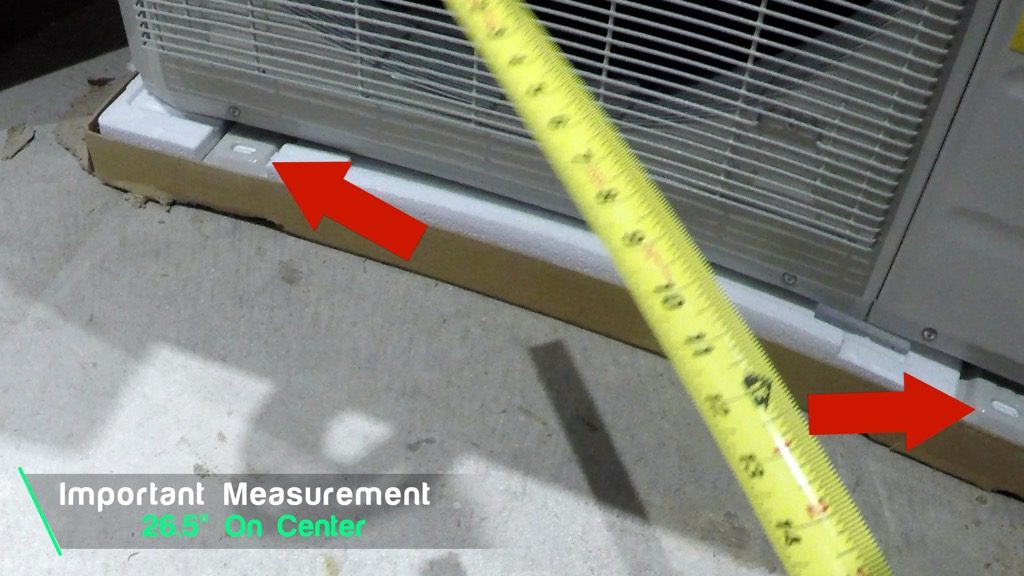
Unlike my first MRCOOL DIY mini split install, this mounting bracket did not include a cross bar.
The cross bar helped keep the mounting bracket at a fixed length apart.
So, I had to measure the length between each foot hole (26.5″) on center before attaching it to the brick.

As I mentioned previously, I chose to mount the MRCOOL DIY mini split adjacent to the main HVAC unit.
In addition, the concrete pad my main HVAC unit rests on did not have enough room for the mini split.


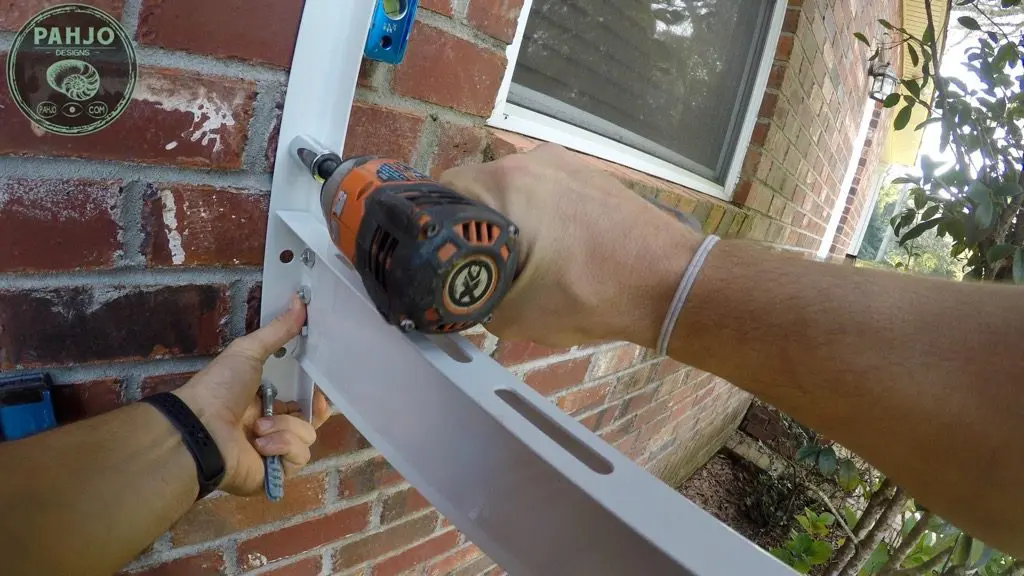
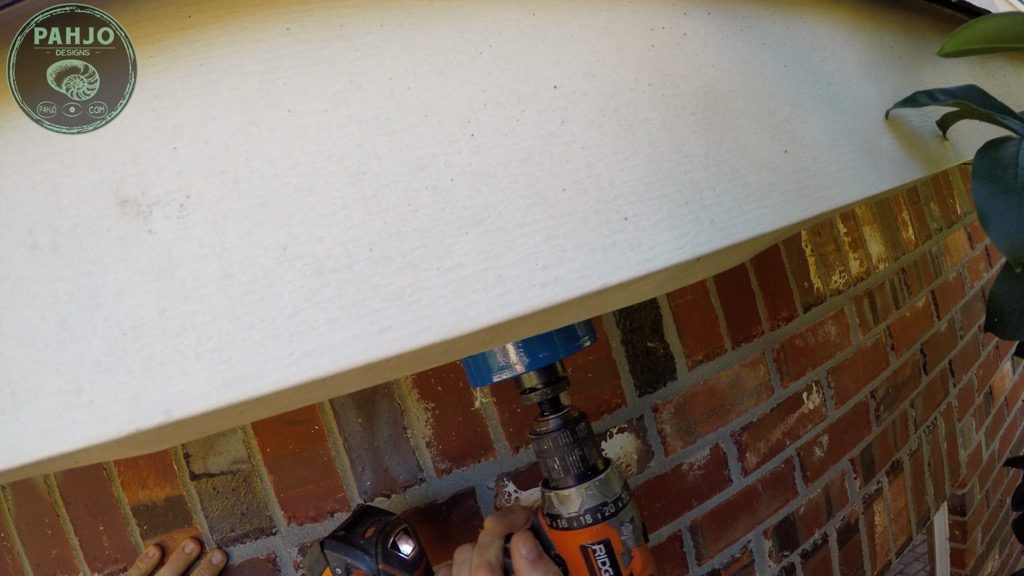
Install Mini Split Outside Condenser on Brick
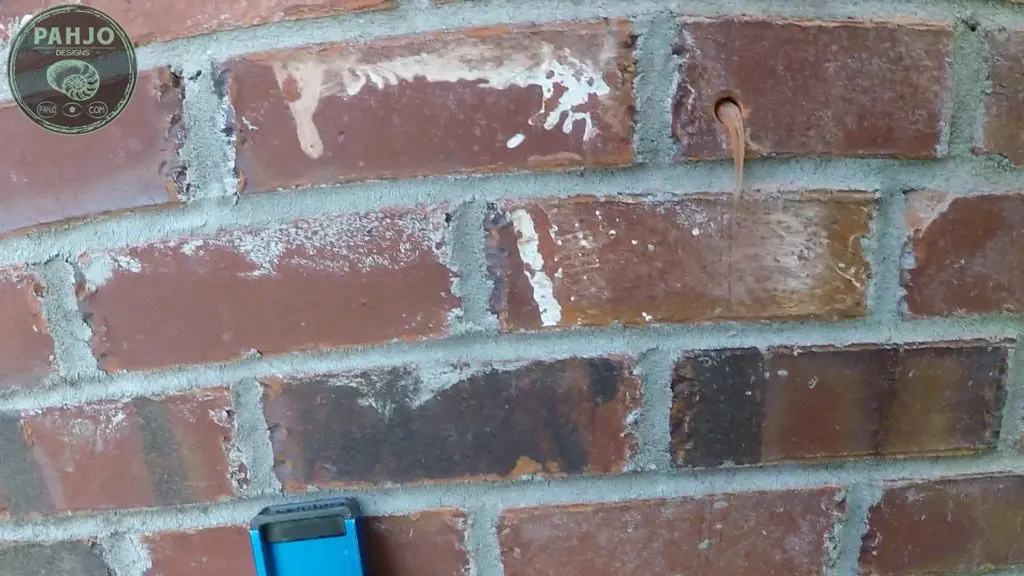
First, I used my 4′ leveler to mark a straight line roughly 6″ to the left of my garage window.

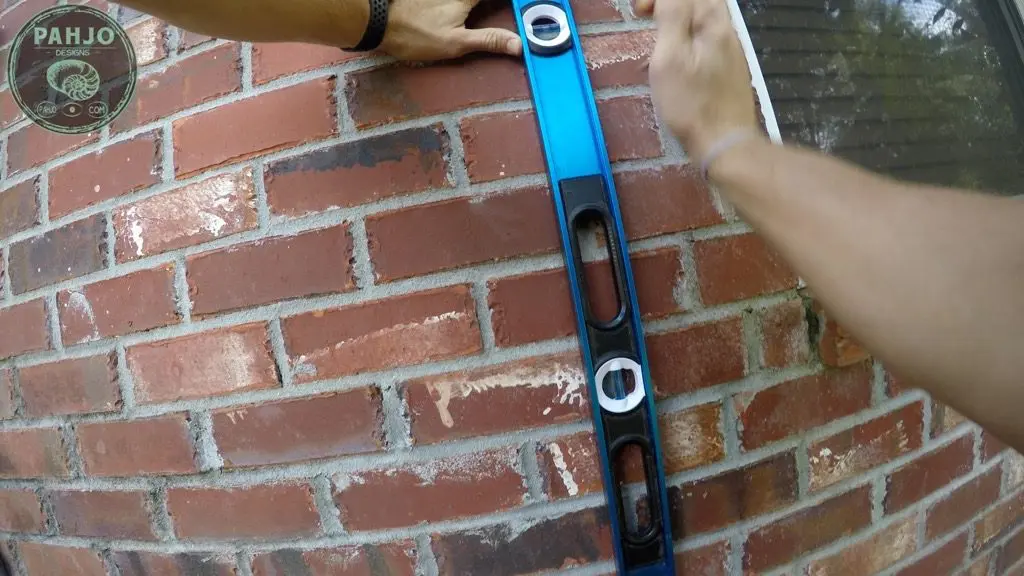
Next, I placed the right bracket on the wall with the line in the middle of each hole.
I marked 3 holes with a circle using my pencil.

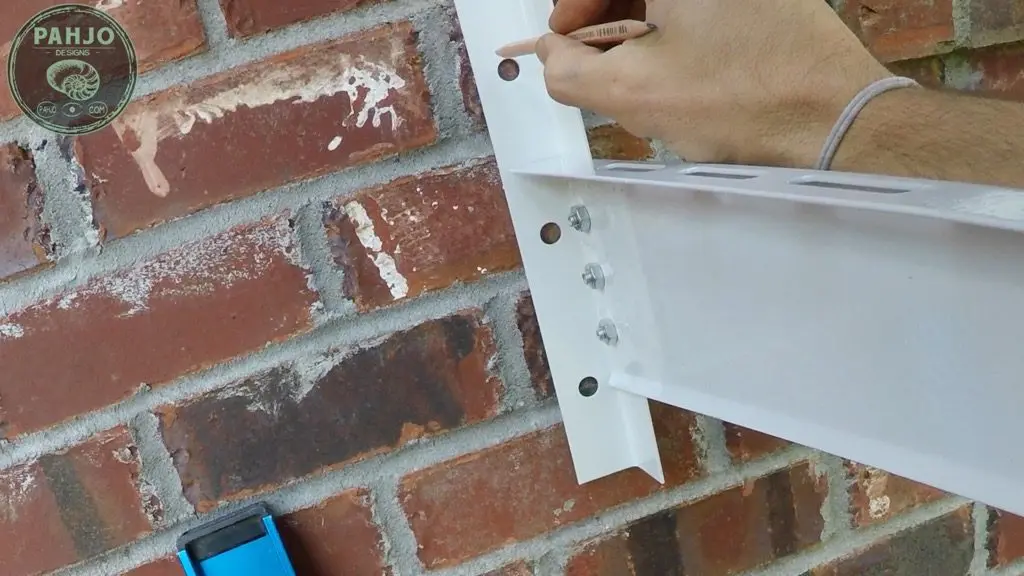
Then, I marked the depth of the bolt on my drill bit to make certain the depth of the hole would be accurate.
I used a masonry bit to drill the hole.


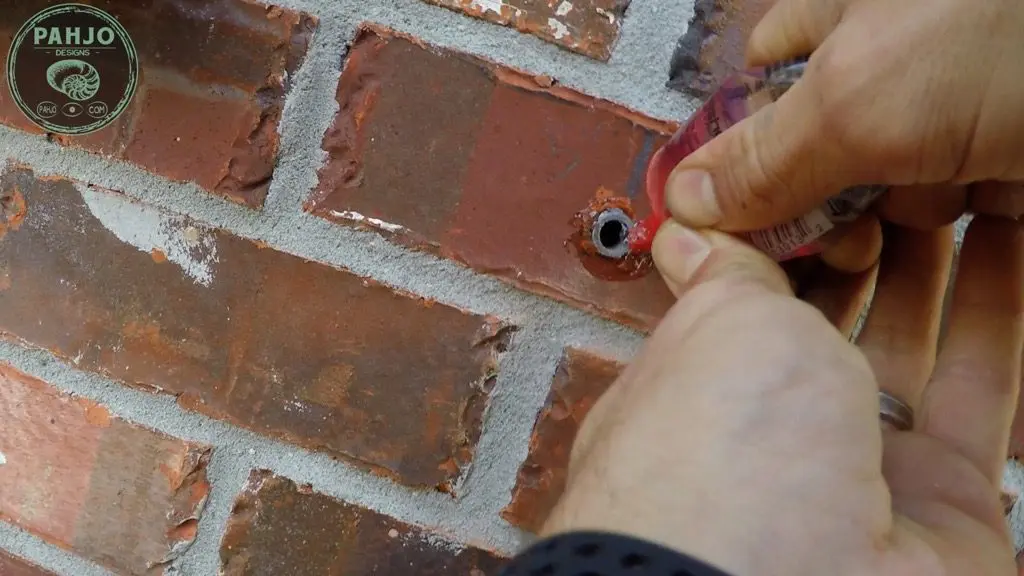
This step isn’t necessary, but it made me feel better.
I put weatherproofing caulk in the hole to seal it before hammering the bolt anchor in place.

Next, I placed the anchor in the hole and gently tapped it with my hammer until it was flush with the brick.
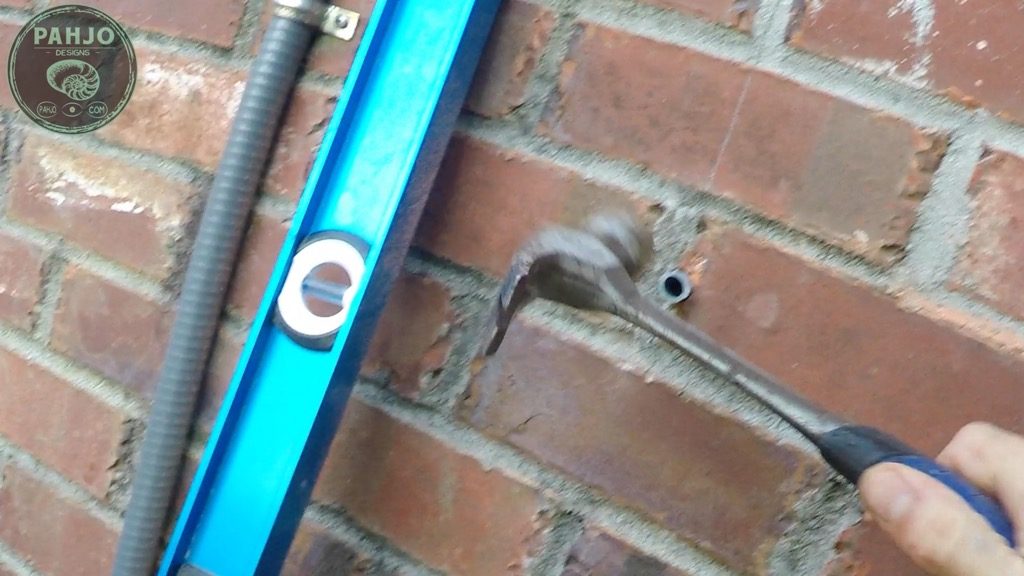

I used more weatherproofing caulk outside of the hole.

Then, I placed the bracket over the hole and tightened the bolt by hand.
I attached my magnetic level to the side to make sure it was level.
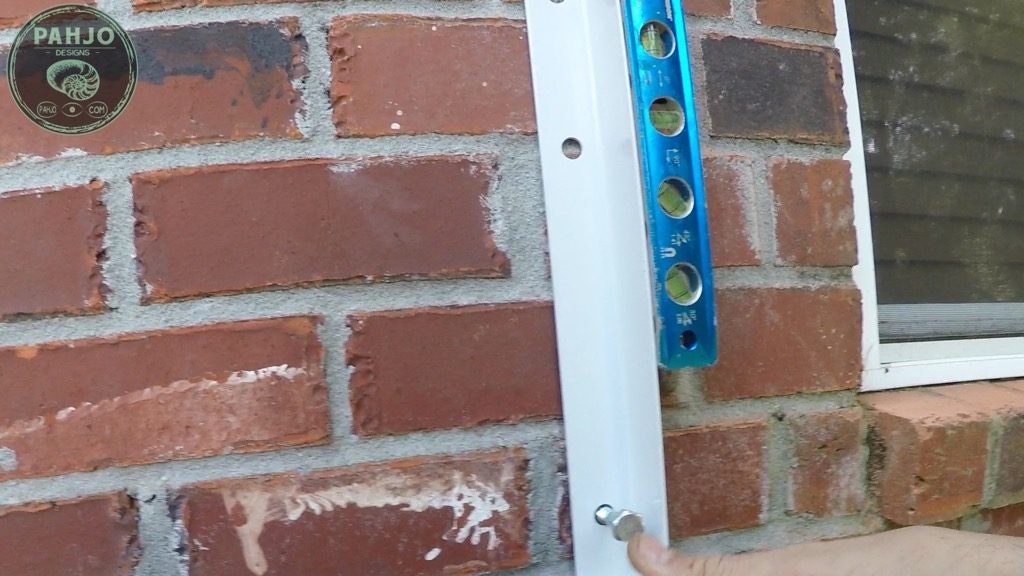

Using my drill with the correct size socket, I tightened the bolt. I repeated this process for the other 2 holes.

After one side was secured to the brick, I used my tape measure and leveler to measure 26.5″ to the left.
Finally, I repeated the process above for the other side.

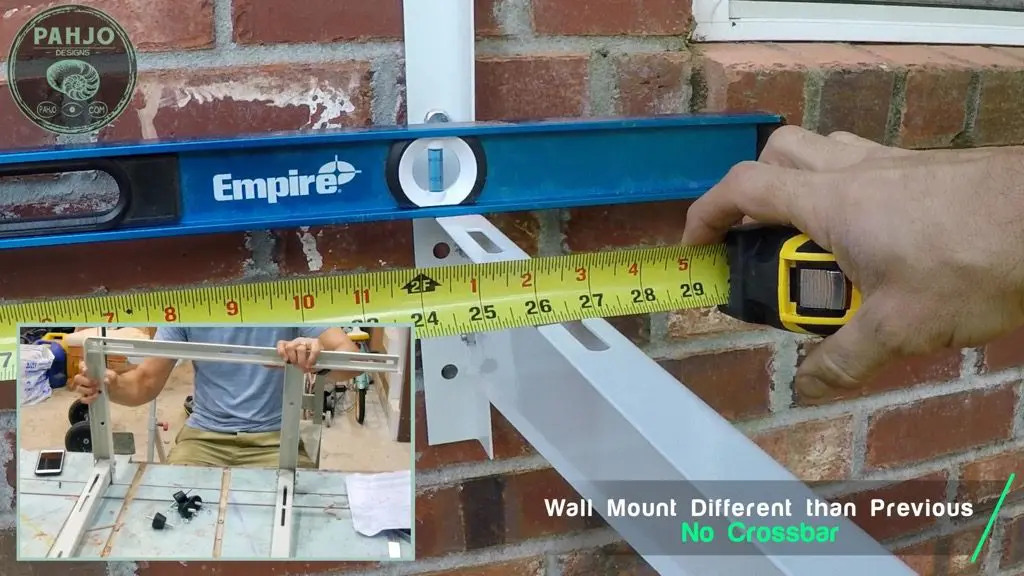
As you can see from the picture above, the previous mounting bracket I installed had a horizontal bar.
The horizontal bar eliminated the need for this step.
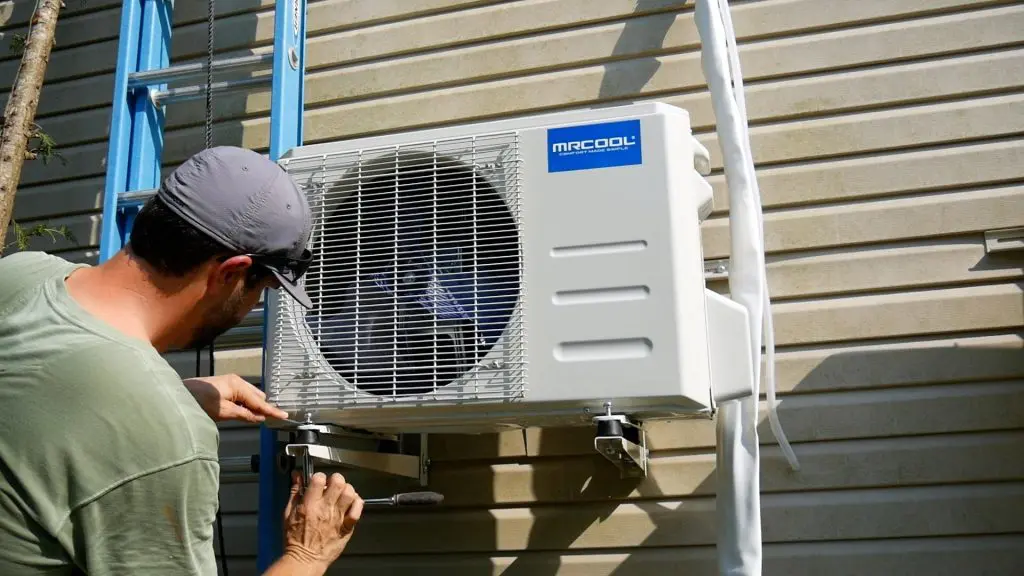
Secure Outside Condenser to Wall Bracket
The outside condenser is very heavy, so I had to call my buddy and his son to help me.
First, I used my furniture dolly to transport the mini split outside condenser from my garage to the install location.

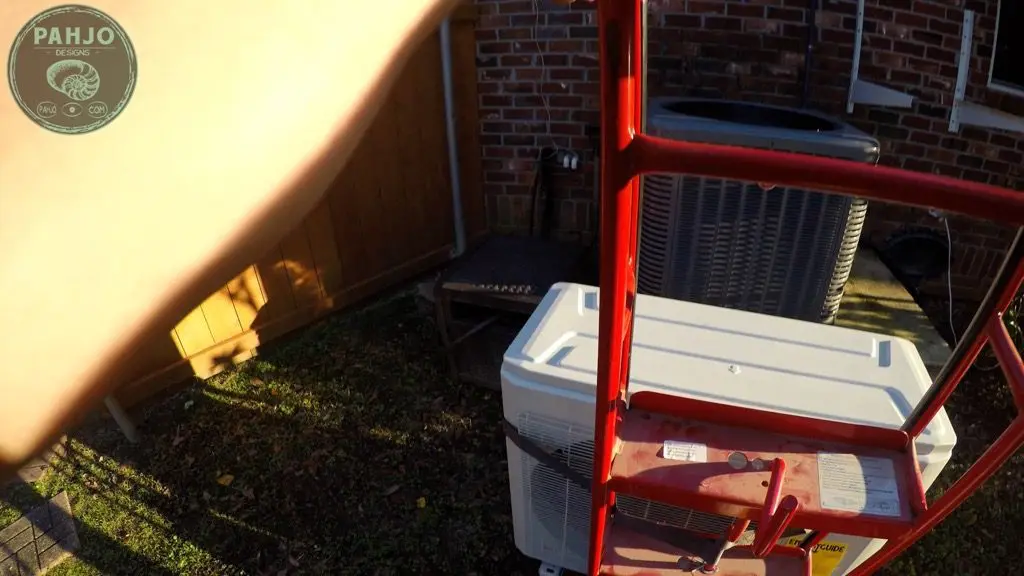
Next, we lifted the condenser on the mounting bracket.
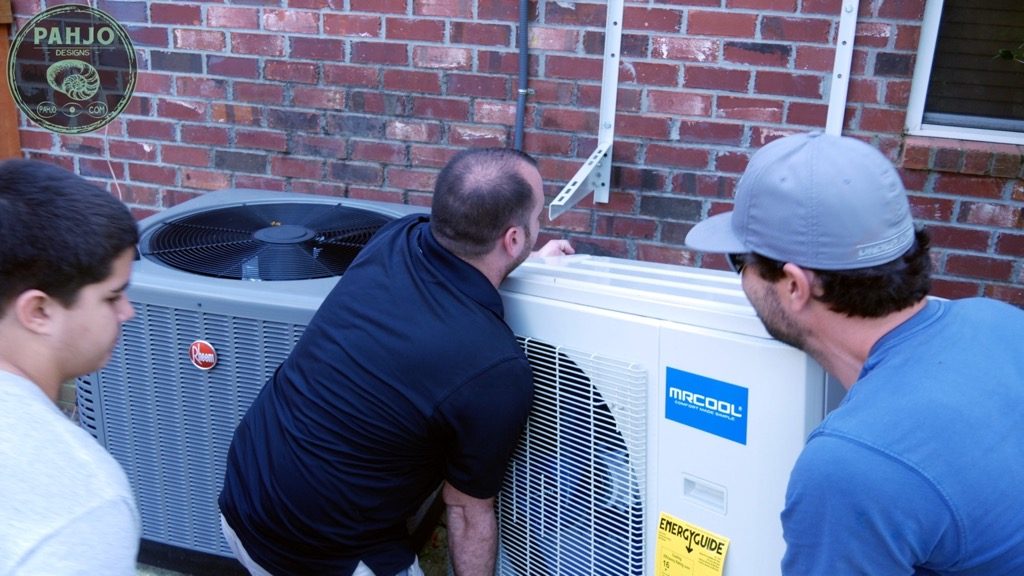

Before attaching the nuts/bolts, I placed the rubber pads below the hole in all 4 corners.
Then, I used the nuts and bolts to secure the 4 corners of the DIY mini split to the wall mounting bracket.


As a final note, I swapped the bolts/nuts included with the mounting bracket to stainless steel nuts and bolts a few days after the installation
Ultimately, I felt the nuts/bolts included with the bracket would eventually rust.
DIY Mini Split Line Set Through Soffit
Now the outside condenser and inside air handler are both mounted, it was time to run the line set from the air handler to the condenser unit.
First, I located a spot within my soffit directly above the refrigerant lines.
Also, I made sure the location did not have a stud directly above it.


Next, I used my drill and 3.5″ hole saw to remove a piece of the vinyl soffit.
Keep in mind, the process remains the same regardless of the material type.

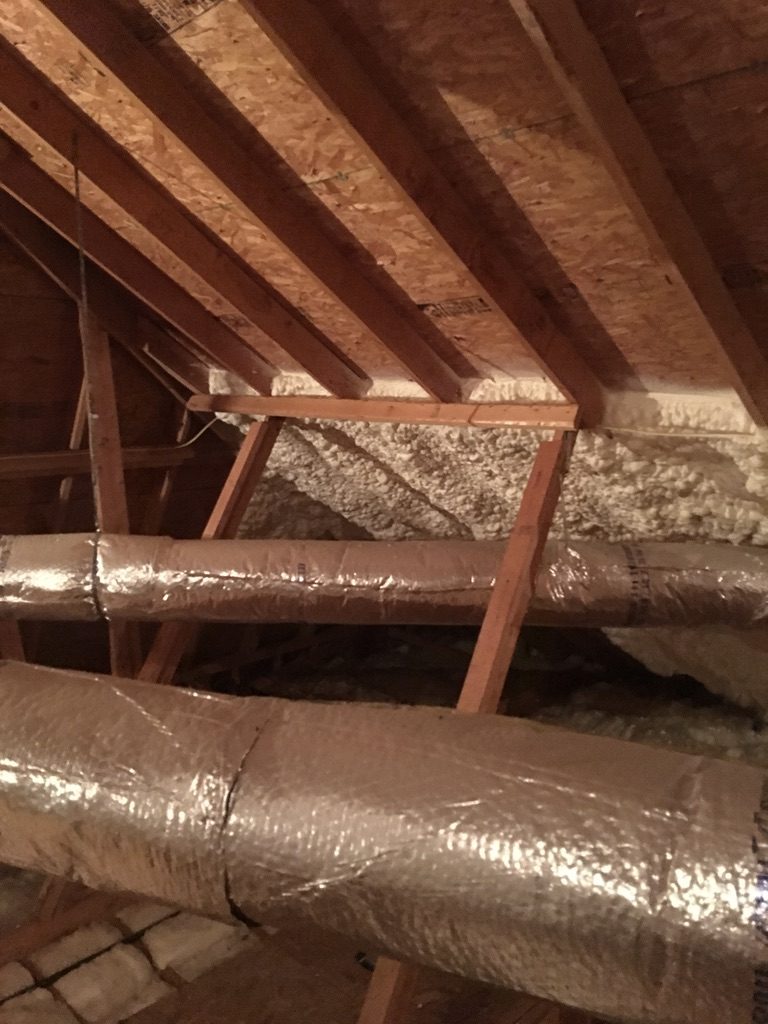
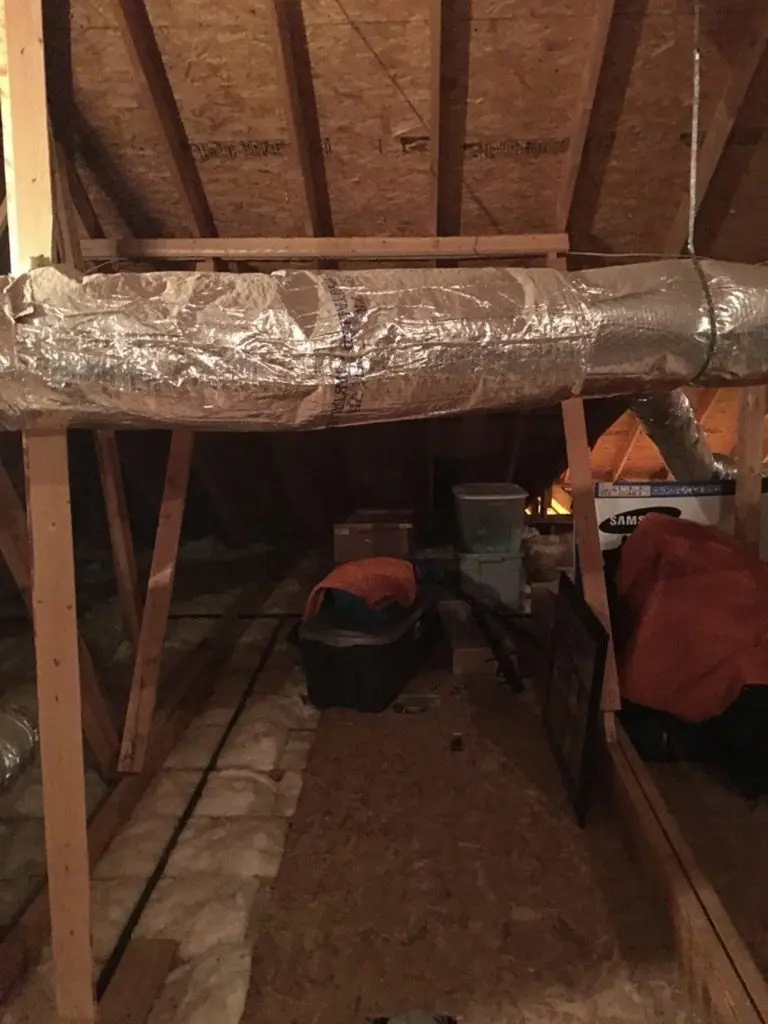
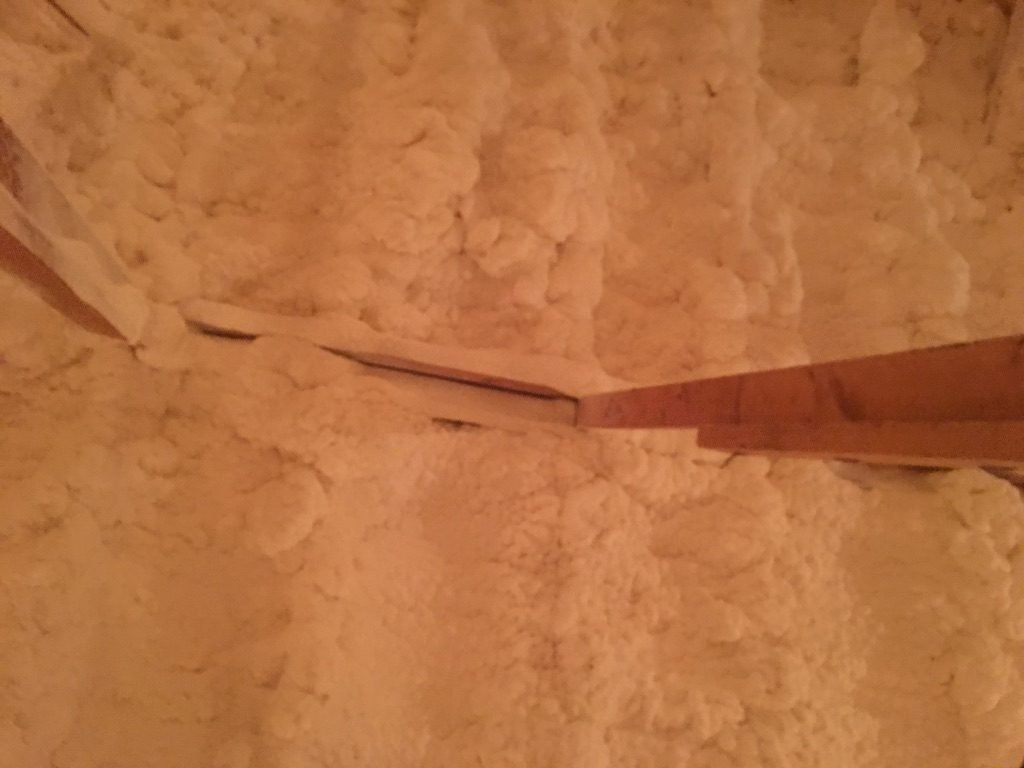
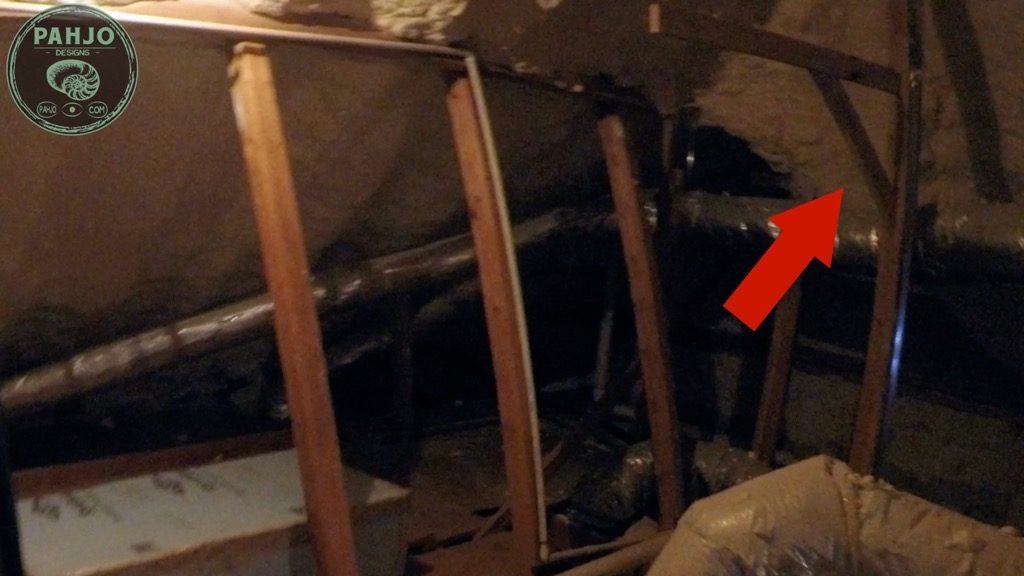
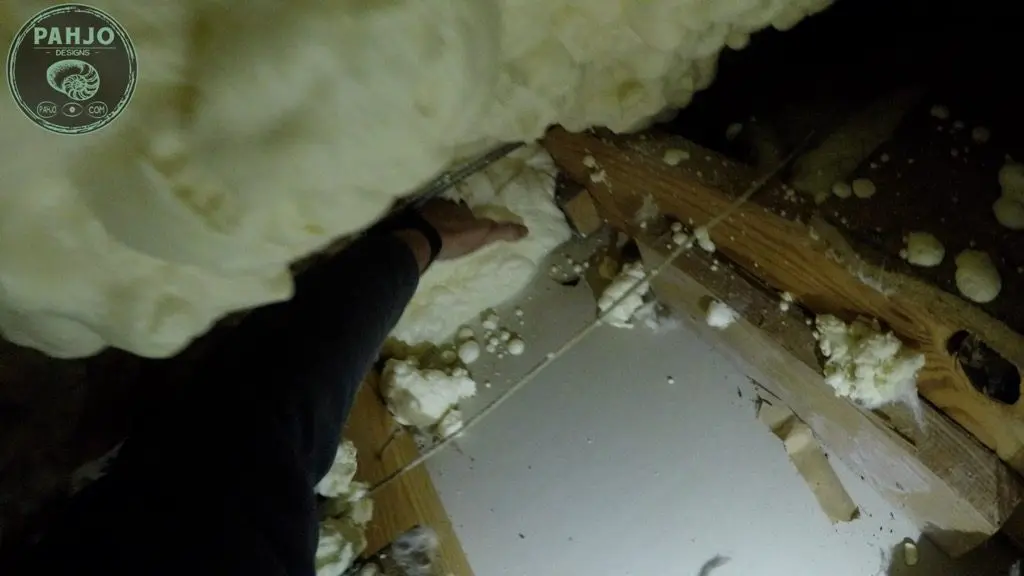
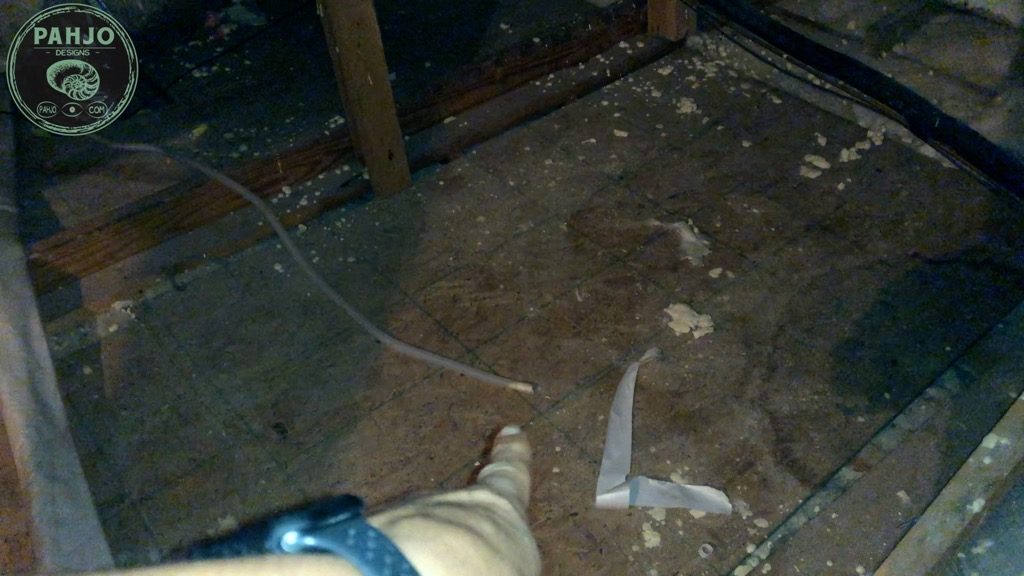
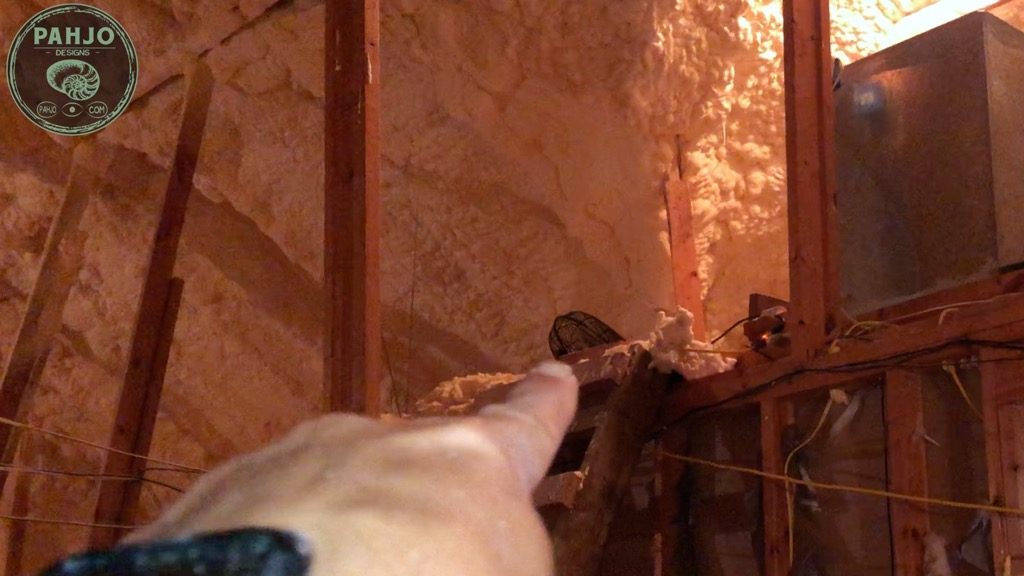
After I drilled the hole outside, I went into the attic and removed a section of open cell spray foam.
This location in the attic is called the ‘attic eaves’.
In addition, I tried to remove the open cell spray foam in large chunks.
Essentially, this makes it easier to reinstall and seal.

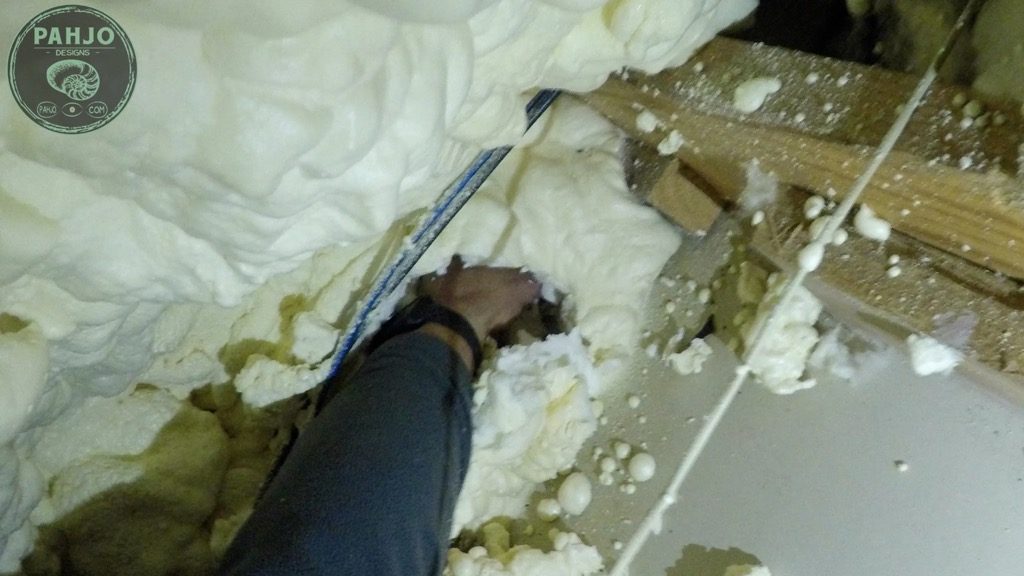

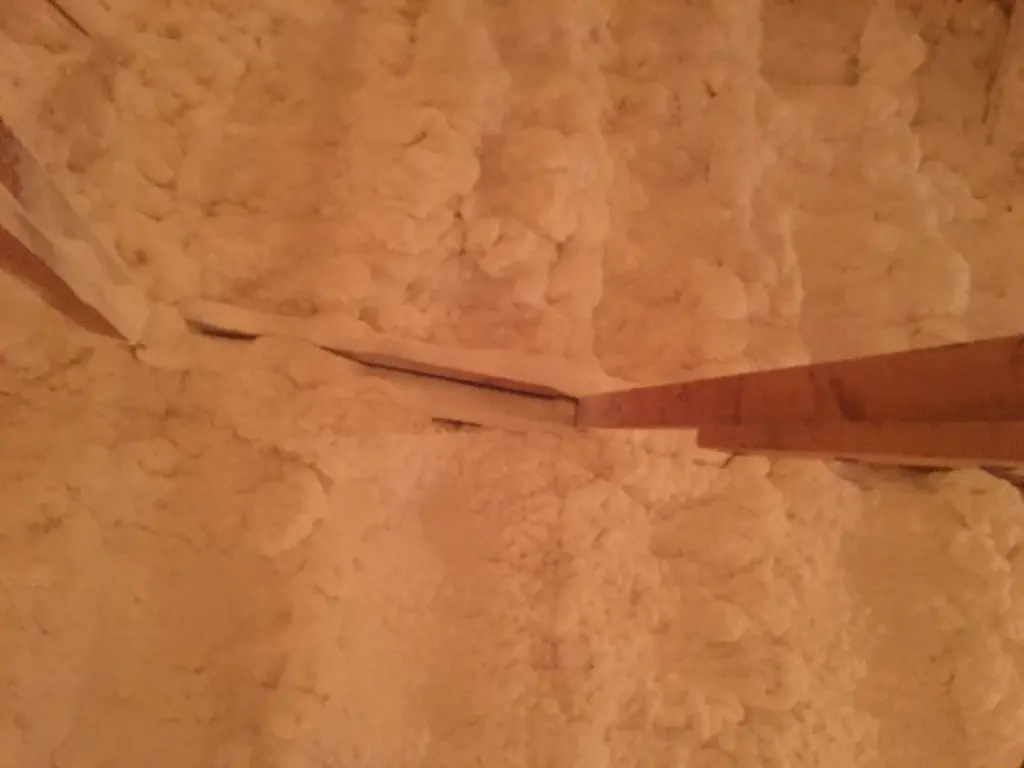
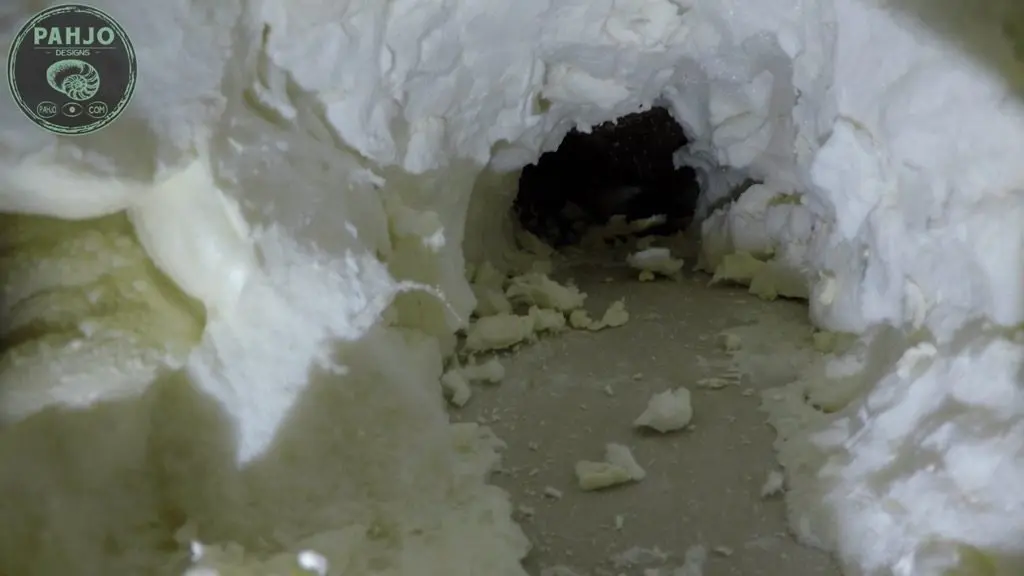
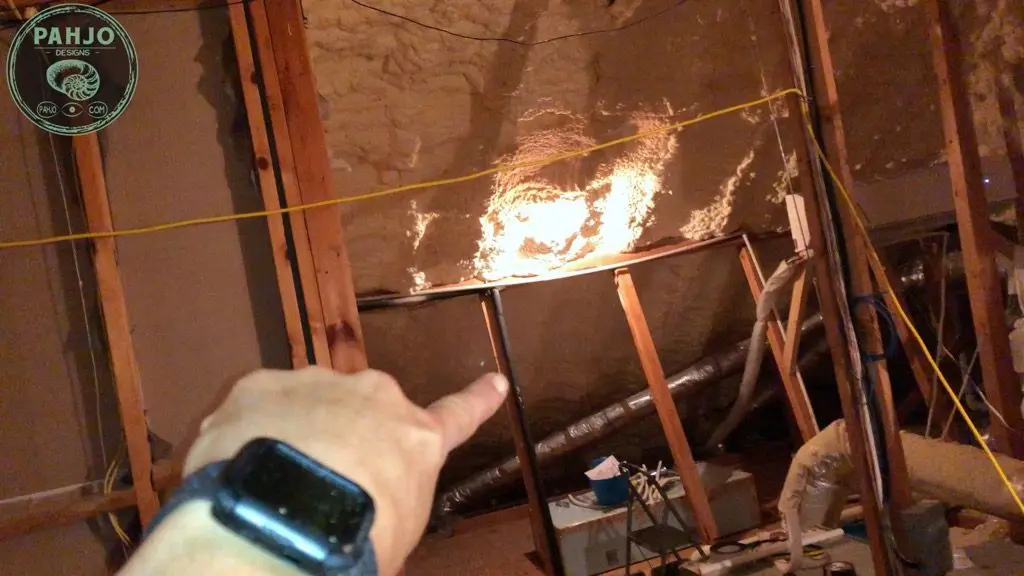
I ended up with a tunnel as shown in the picture below.

Then, I wrapped the pipe and drain hose together with electrical tape.
I pushed the line set through the hole with the drain hose on the bottom (towards the brick) of the line set bundle.
After I pushed about 3′ of the line set into the open cell spray foam hole, I went outside and pulled the excess I needed to comfortably connect the refrigerant lines.
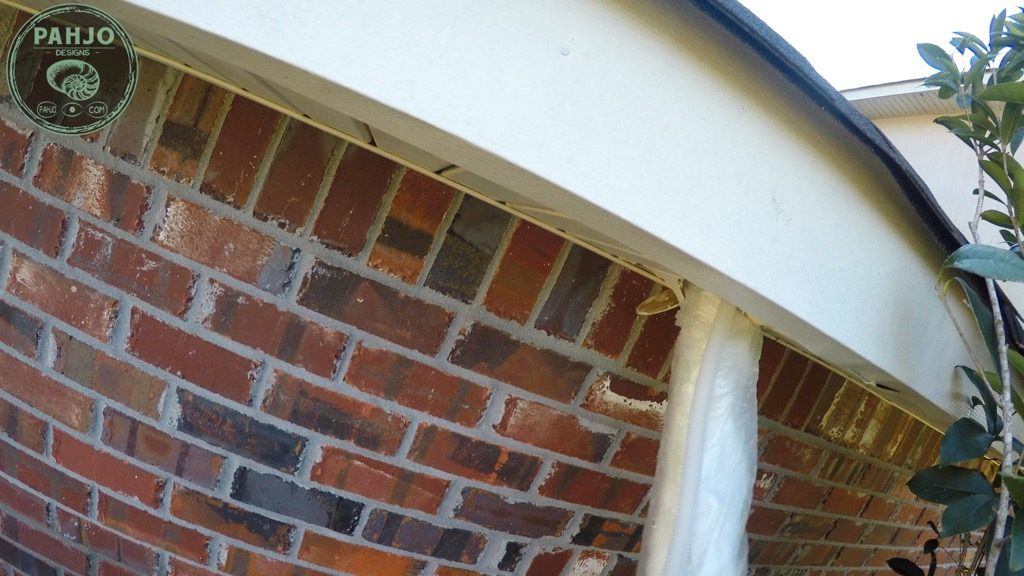
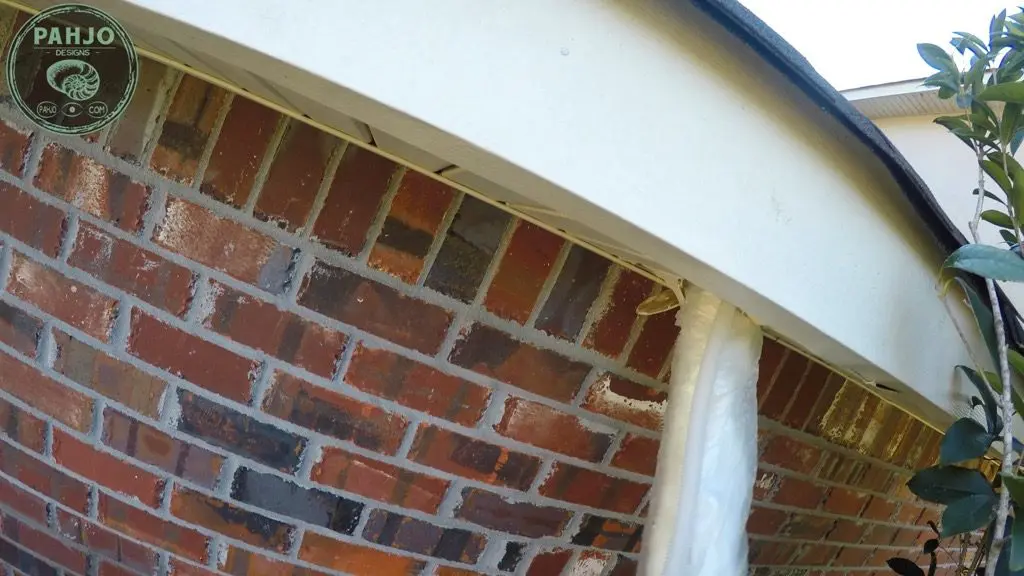
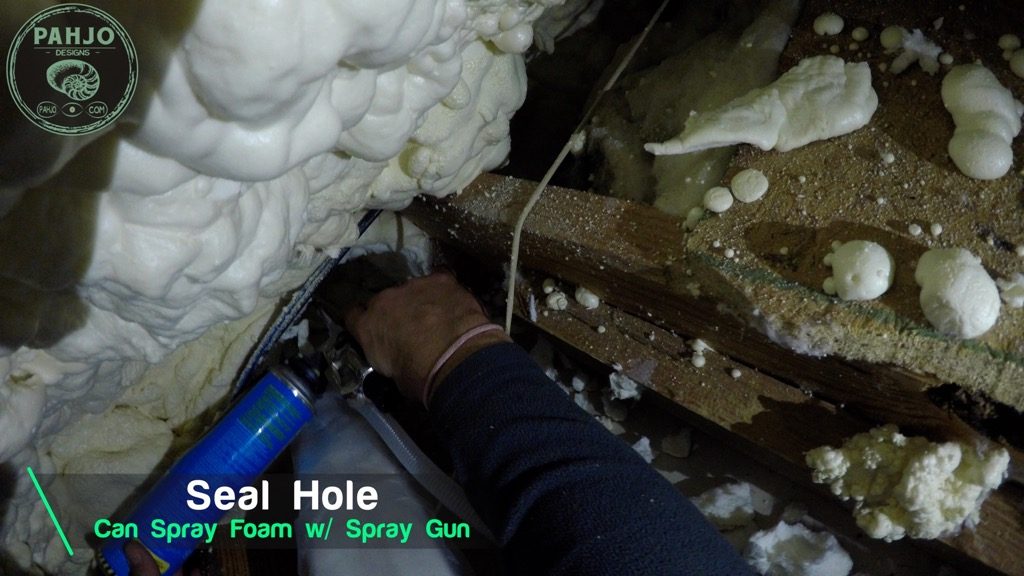
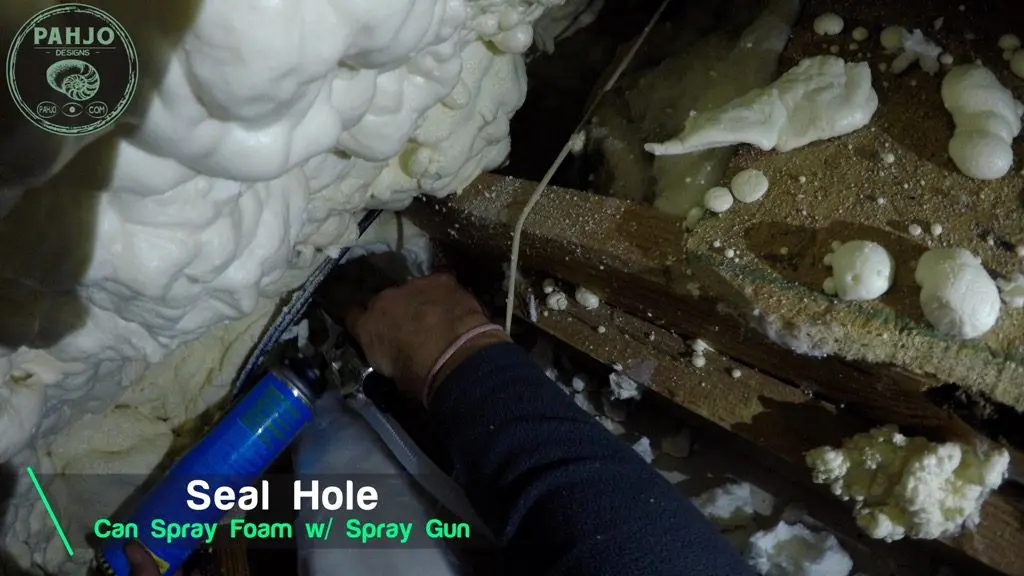
Finally, I went back into my spray foam attic and pushed the large pieces of spray foam back into place.
Once they were snug, I used a spray foam gun and closed cell spray foam can to seal everything back in place.
Open cell spray foam is difficult to find in a can, so I used a closed cell spray foam can to only seal.
Connect Mini Split Electrical Harness
First, I used my drill to remove the electrical wiring cover at the top of the unit on the right side.
Also, refer to the wiring diagram for 110V and 220V terminal assignments.
The MRCOOL DIY 36K runs on 220V. So, I used those terminals.
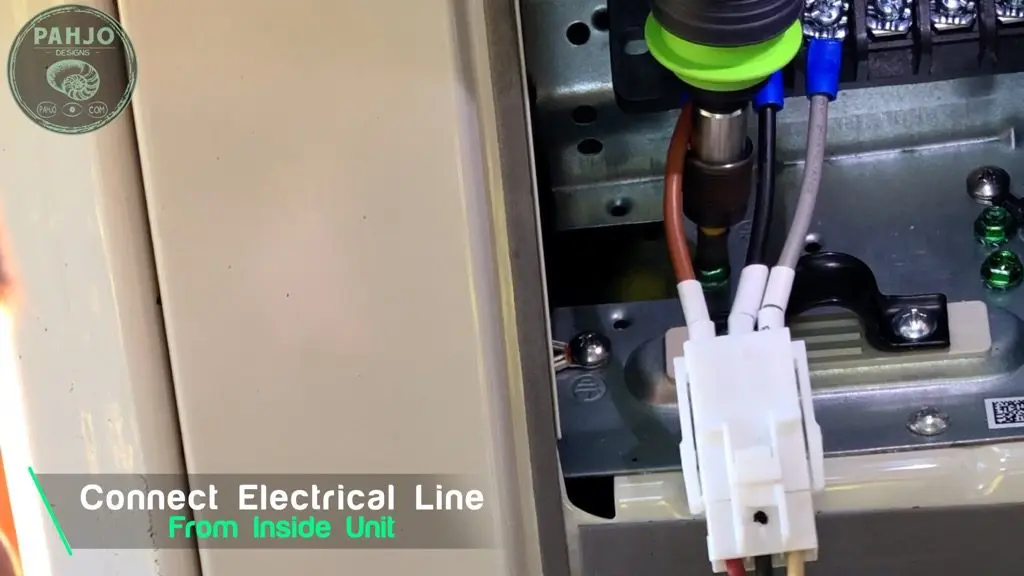
Next, I attached the wiring harness and pushed until I heard a click.
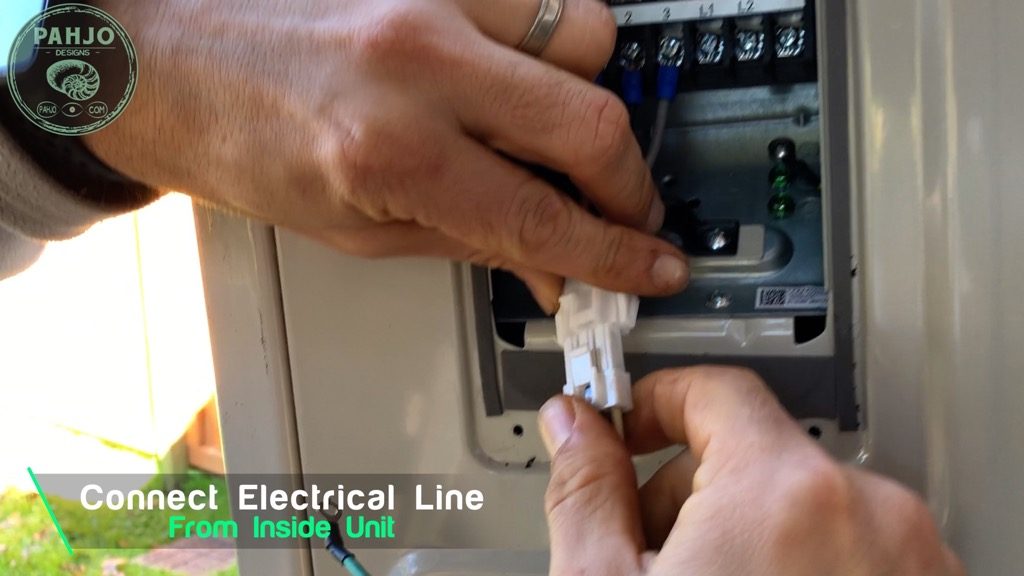
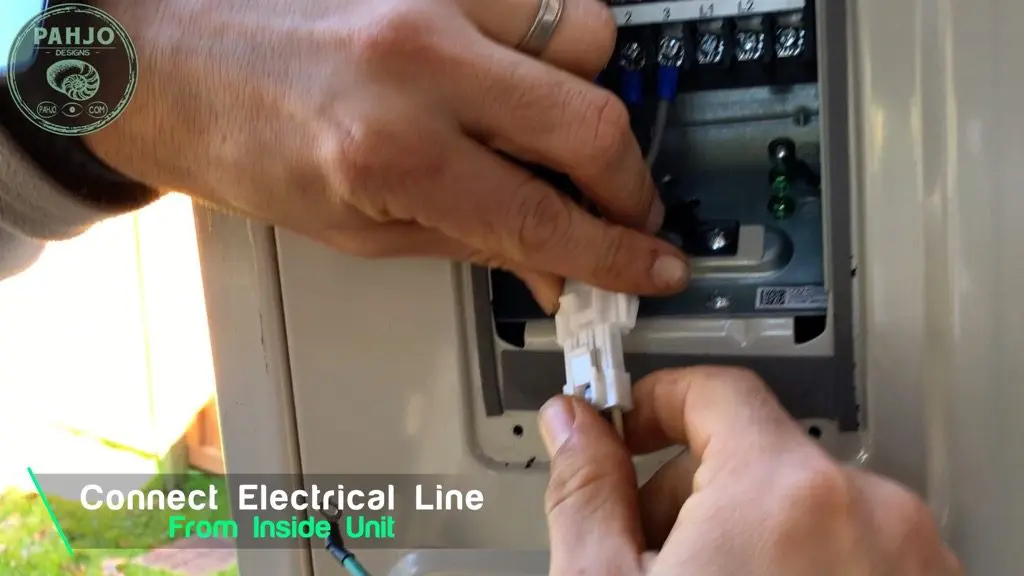
Then, I unscrewed the green ground screw, attached the ground wire, and tightened the screw.

MRCOOL Mini Split Precharged Refrigerant Lines
I’ve received so many questions and comments on my blog post and YouTube Video regarding MRCOOL DIY Mini Split precharged refrigerant line sets.
Below are some comments I received from folks who just refuse to believe these line sets exist. Little do they know, these have been around for years.
“No vacuuming the Lines? You have to get the air and moisture out dude.”
“This unit won’t last.”
“This isn’t for real. You just got ripped off.”
Most of these comments originate from HVAC professionals or people who don’t know about pre-charged line sets.
For the sake of time, visit here to learn more about pre-charged line sets.
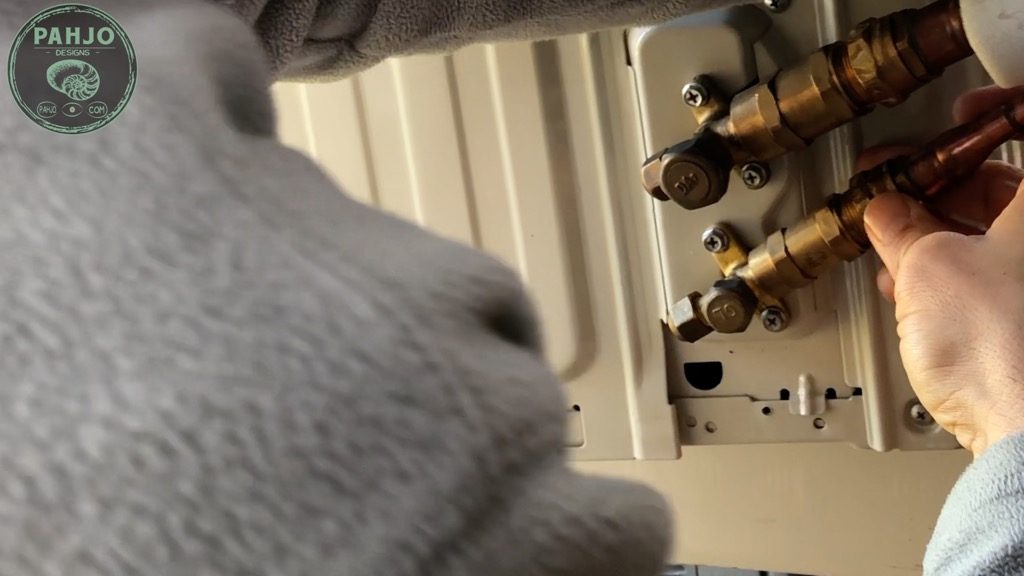
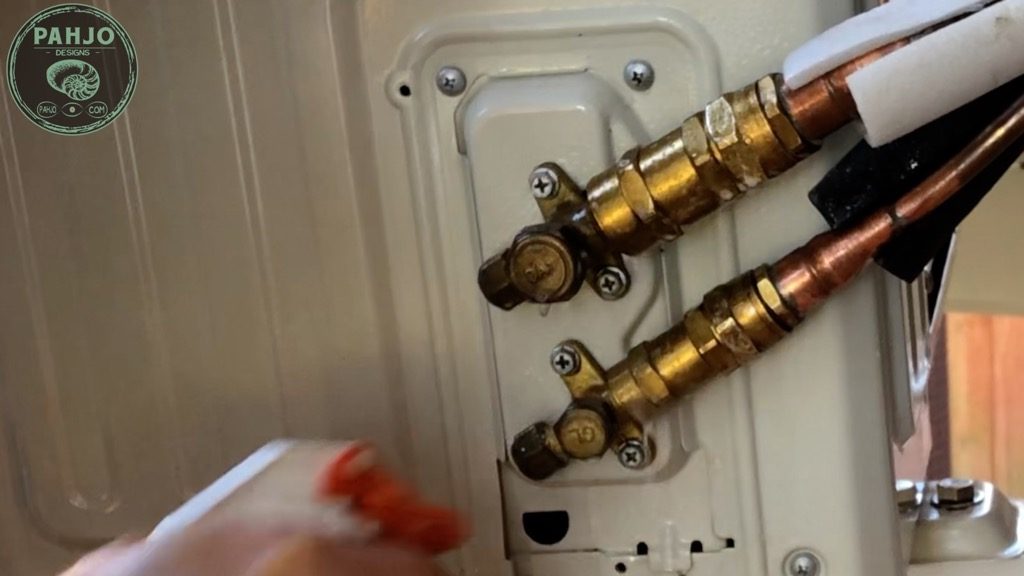
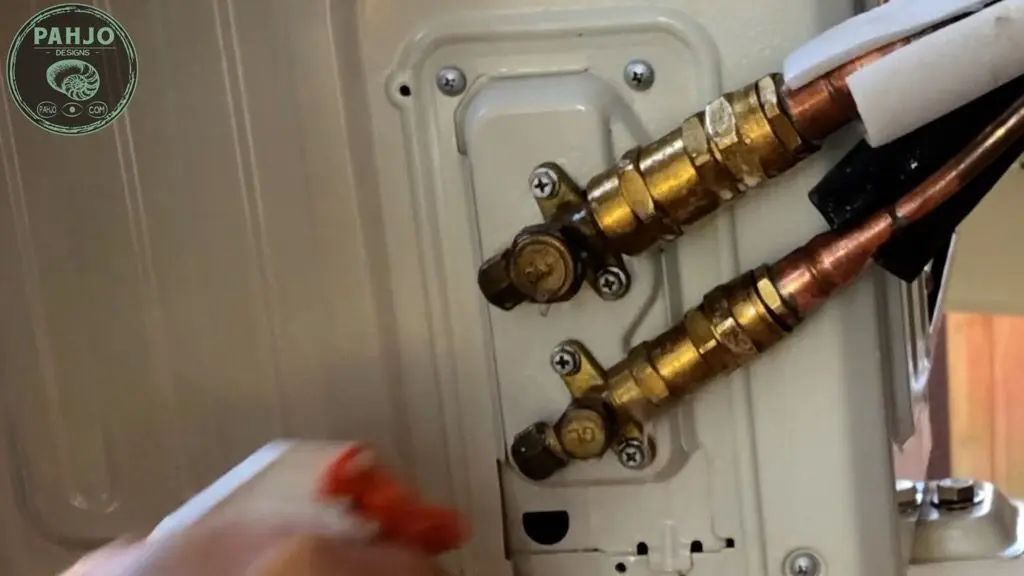
Below the electrical box, remove the water tray cover to expose the refrigerant valves.
As mentioned previously, this line set is pre-charged with R410A refrigerant.
So, it is vitally important to refer to the instructions in your manual for this step.

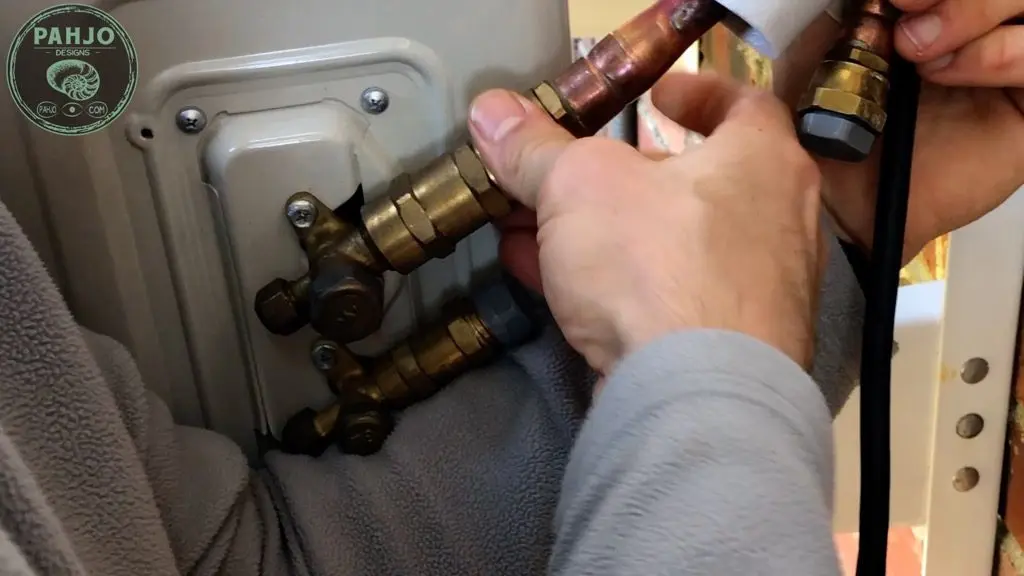
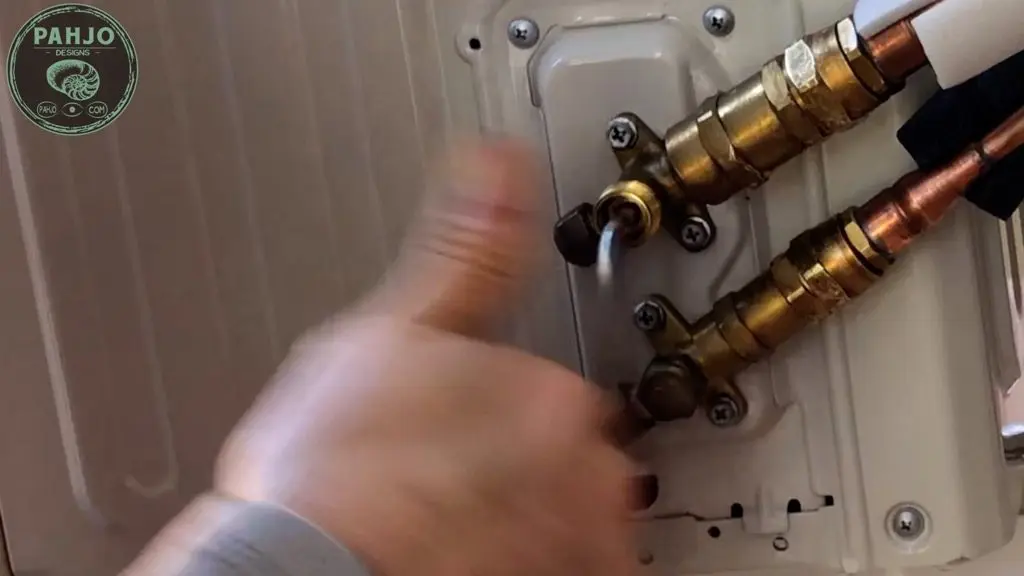
First, I hand tightened the first few threads for the top valve and the bottom valve.

Next, I used 2 open ended wrenches to tighten the bottom connector.
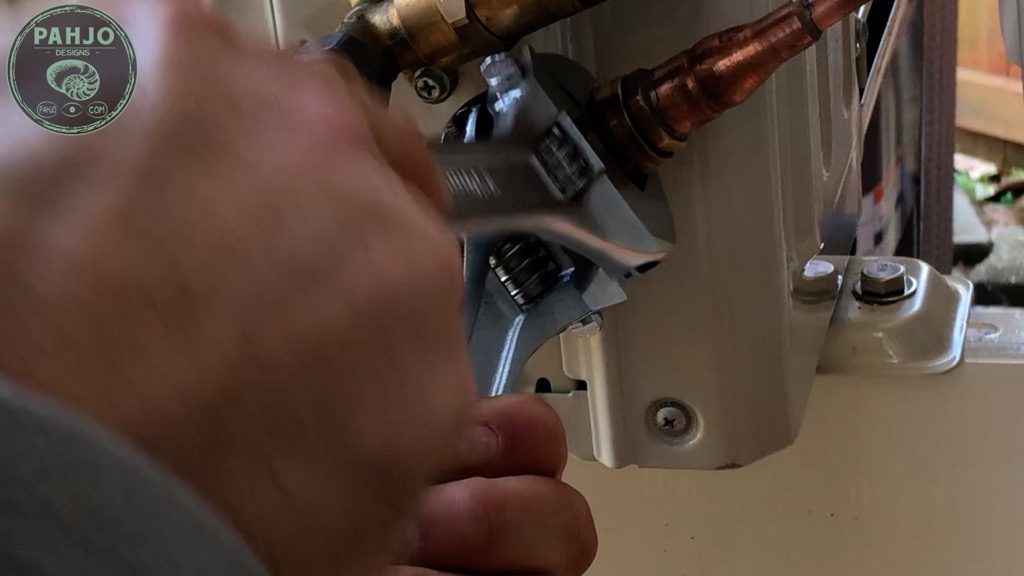

Then, I tightened the top connector.
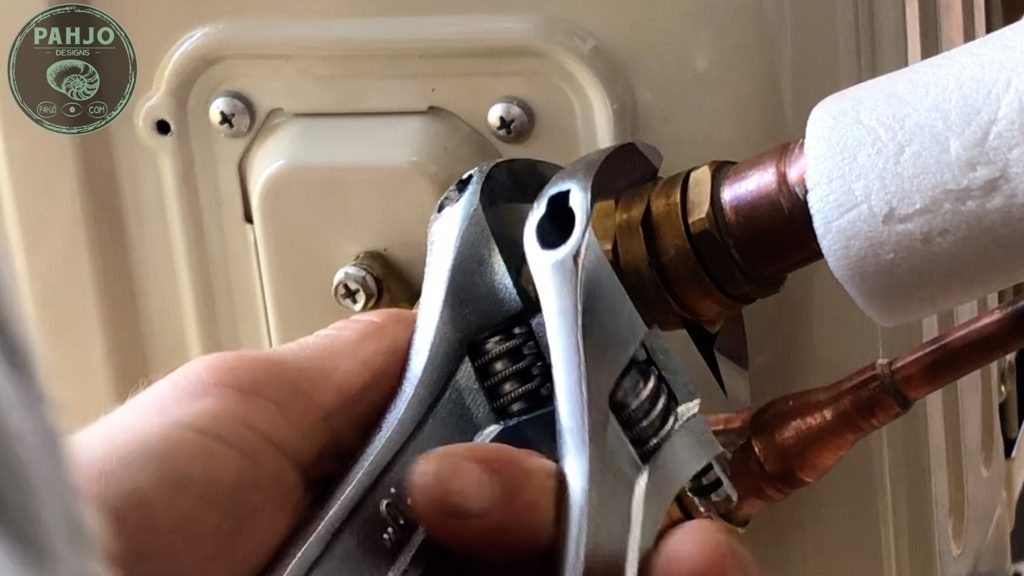

After the top and bottom were secured, I checked for leaks with soapy water.

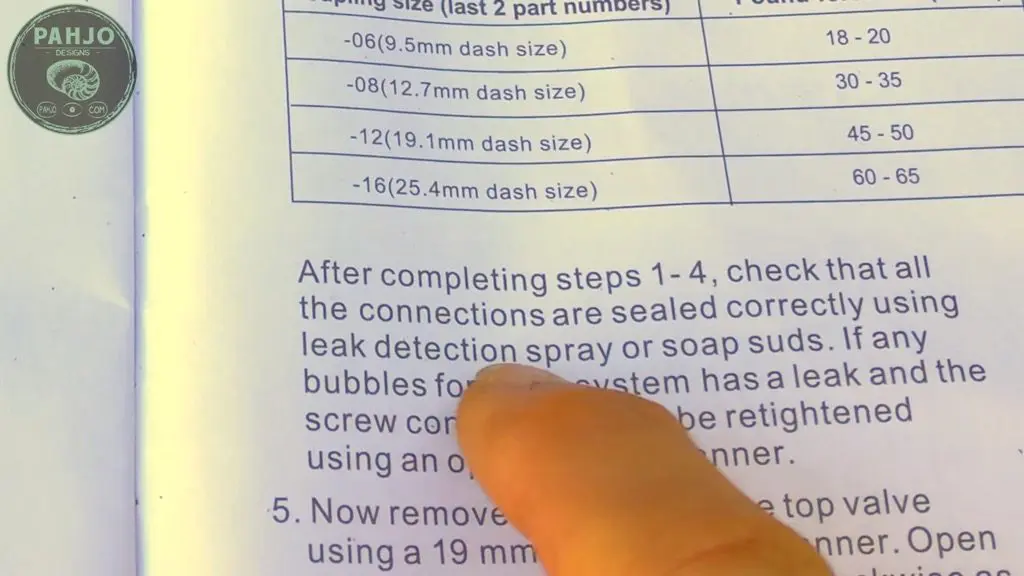
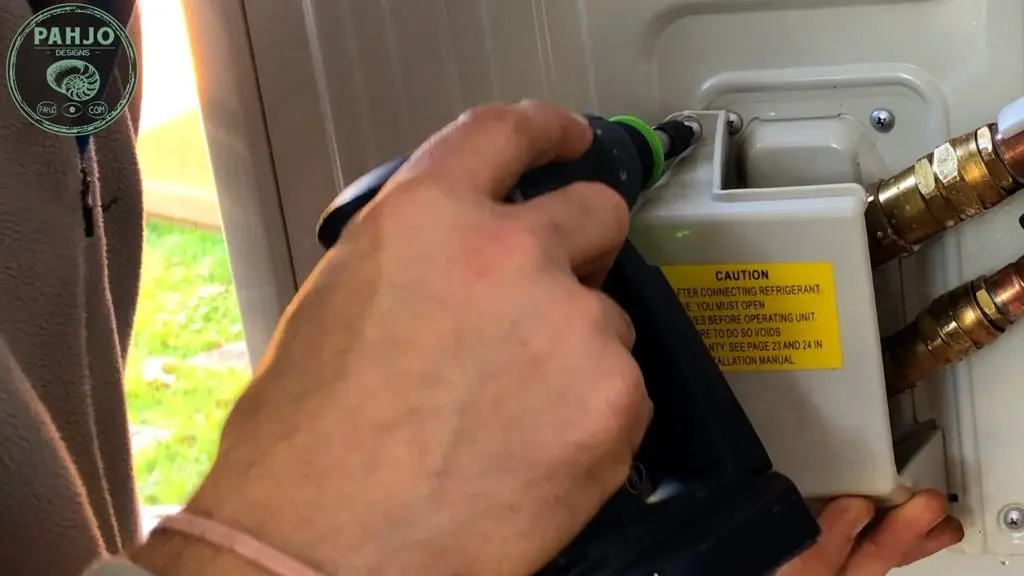
Open DIY Mini Split Valves
As depicted below, I used the provided 19mm open-ended spanner to open the valves.
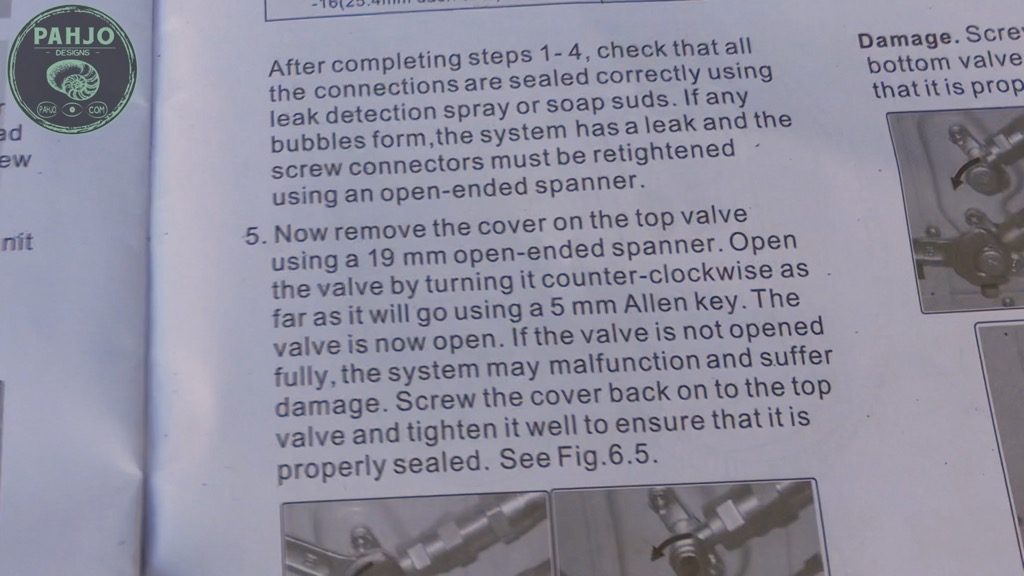
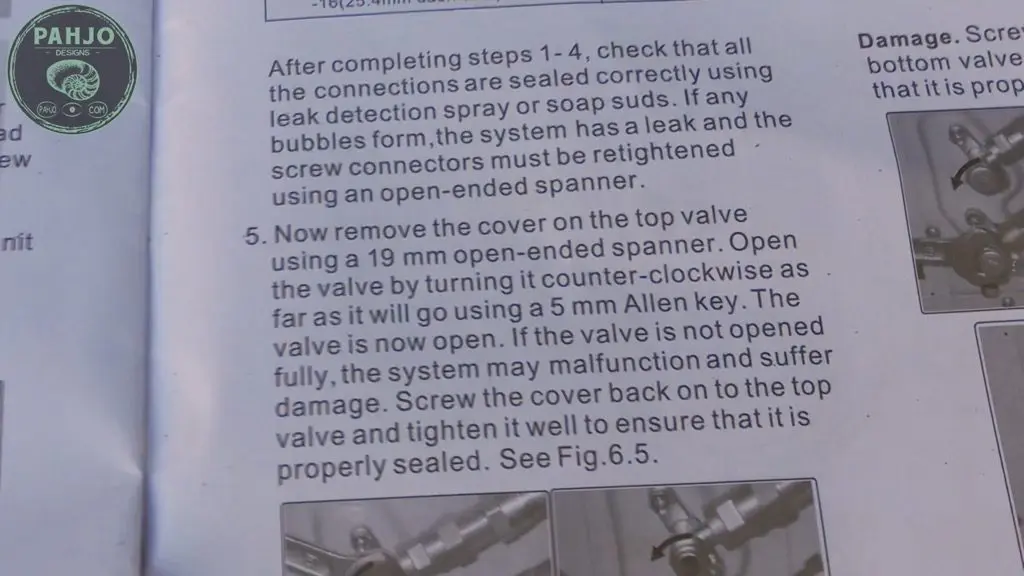
First, I unscrewed the cover and inserted the wrench into the valve.
Next, I turned the wrench counterclockwise until it fully opened.

Then, I repeated the same procedure on the other valve.

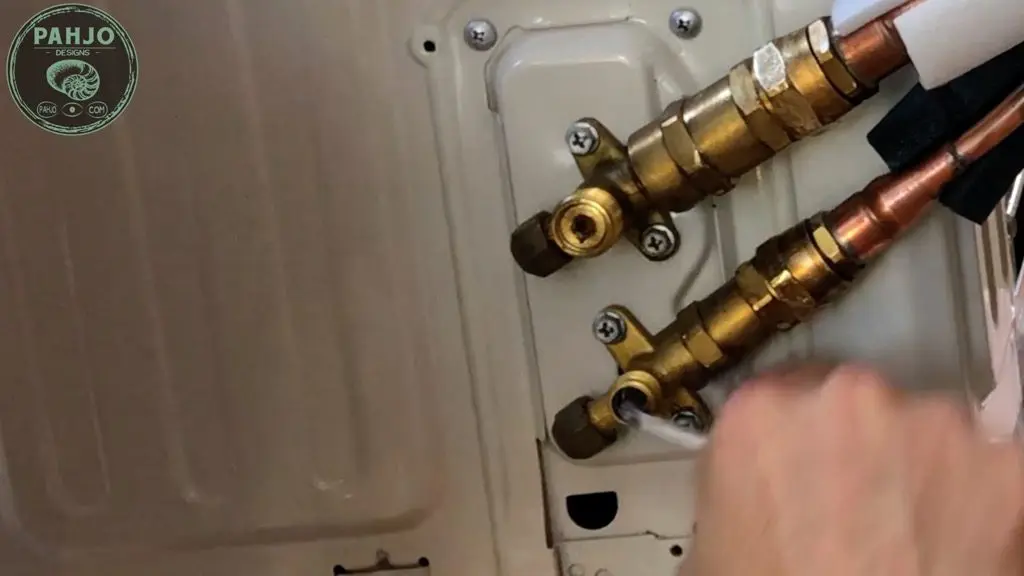
I checked for leaks again and re-installed the cover.

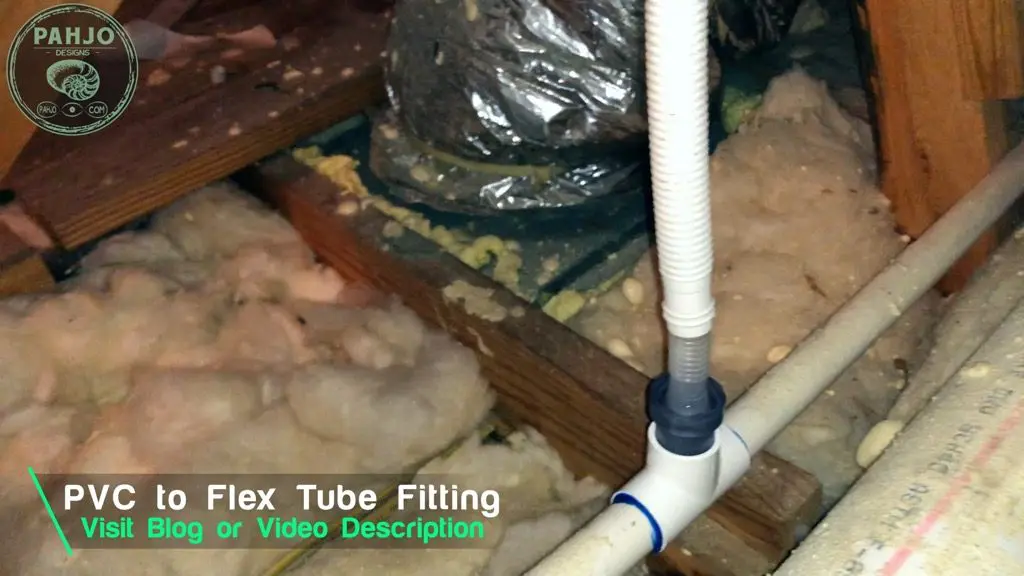
Splice PVC to Flex Tube adapter for Drain Hose
After I connected the refrigerant lines, I noticed the drain line for one of my existing HVAC units passed directly below the mini split.
As a result, I decided to cut the drain hose and splice it into this drain line.

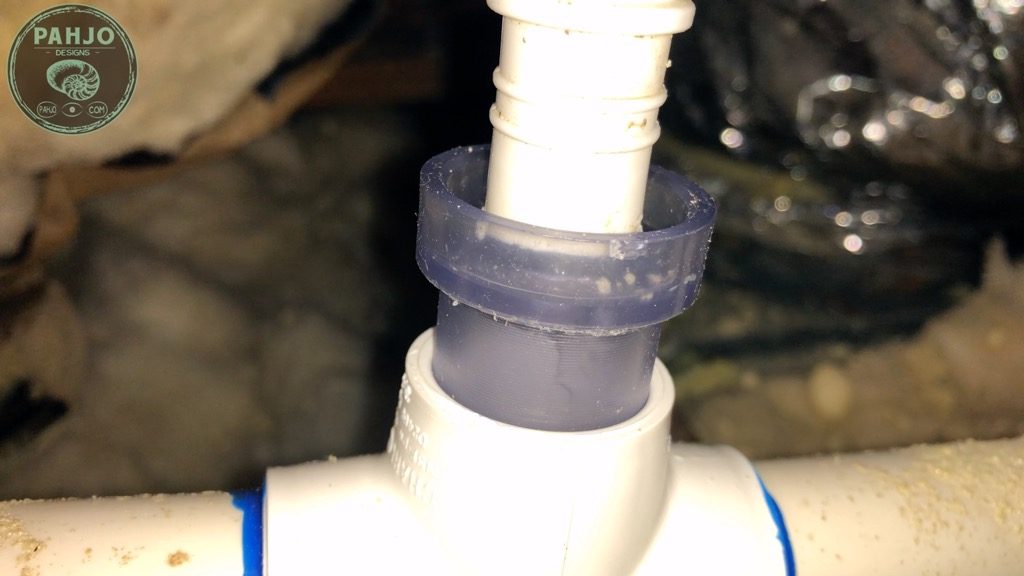
I found this 5/8″ to 3/4″ PVC pipe adapter on amazon and it worked perfectly.
First, I cut my existing drain line with PVC cutters.
Next, I measured the distance between the 2 stops within the fitting. I removed this amount from the PVC pipe.
Then, I dry fitted everything in place to make certain it fit.
Finally, I applied glue to the pvc pipe and slid the fitting in place.

I connected the drain line to the top portion. Once secured, I turned on the unit to make sure everything drained properly.

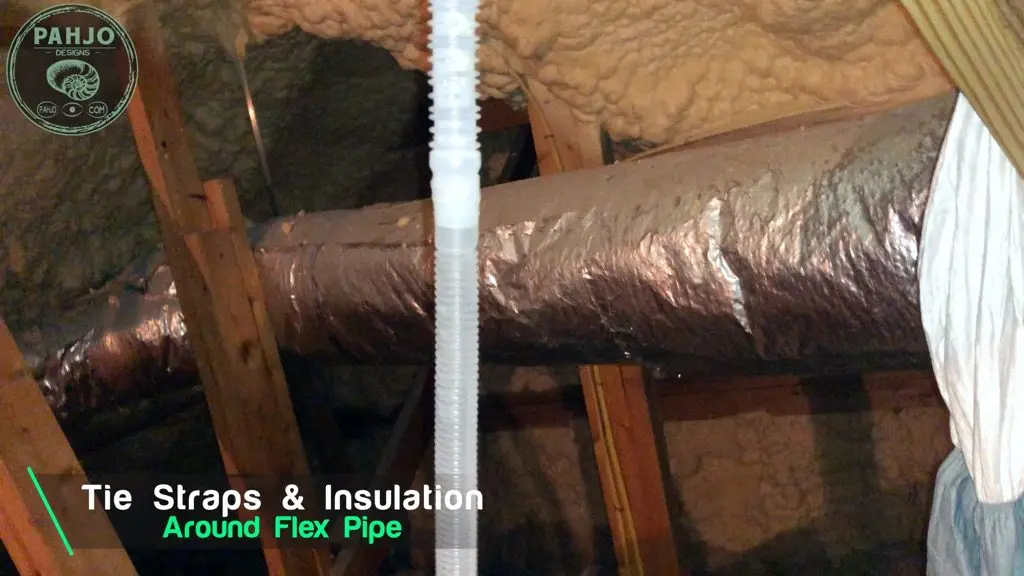
Even though the drain line is working, I have 2 more things to do.
First, I need to insulate the flex tube to prevent condensation from forming.
Secondly, I need to use tie wraps where I connected the flex tube together to prevent them from coming apart.

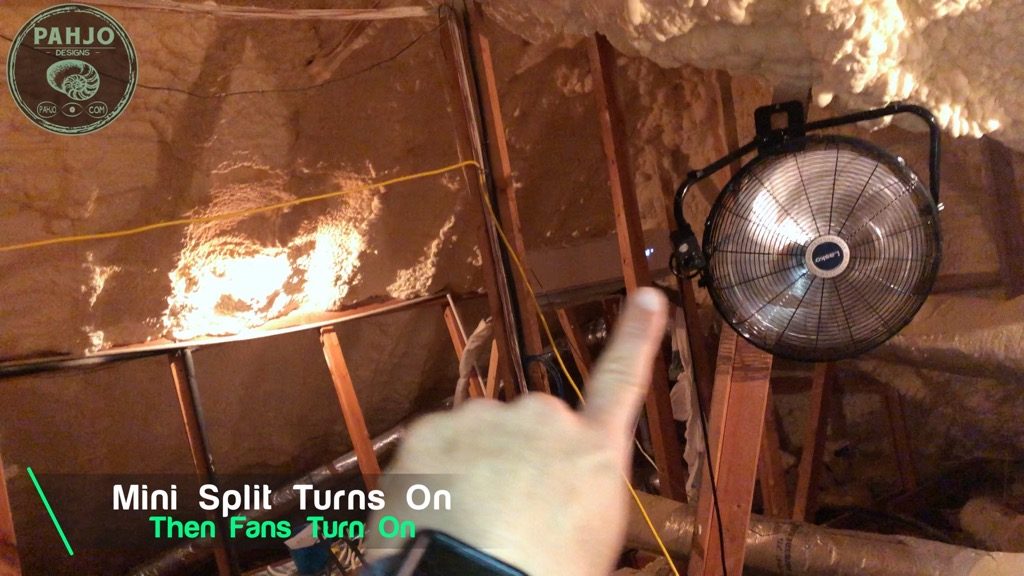
DIY Mini Split Air Circulation
As I mentioned previously, the DIY 36K mini split is undersized for my entire attic.
Consequently, I installed 2 attic fans which help circulate the air.
Furthermore, the attic fans automatically turn on only when the mini split turns on.
The first fan rests the same height off the floor as the mini split roughly 20 feet in front.
The conditioned air leaves the mini split and enters the first fan.


Then, the air leaves the first fan and travels to the other side of the attic to the second fan.

The second fan pushes the air behind the DIY mini split.

Essentially, this creates a circular pattern in my attic.
MRCOOL DIY Mini Split Smart Controller Setup
The MRCOOL DIY 36K ductless mini split now comes with a wifi-enabled smart controller.
In addition, the new smart controller integrates with Amazon Alexa, Google Home, or the SMARTHVAC app.
My existing MRCOOL mini split units are equipped with wifi, but only integrate with MRCOOL’s app.
First, I installed the USB smart controller on the inside door panel of the mini split and used the remote to turn on the unit.

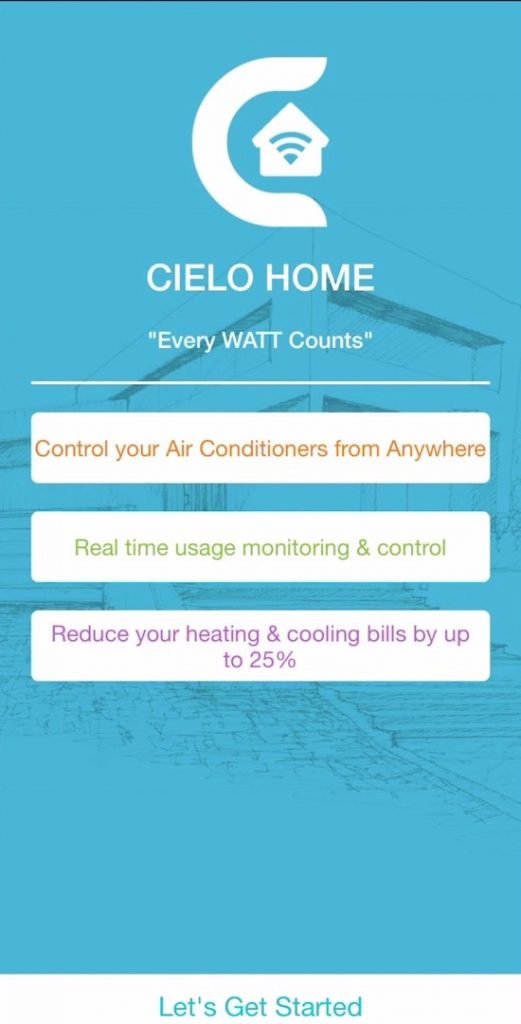
Using my iPhone, I downloaded the Cielo home app from the app store.
Also, the Cielo home app and the SMARTHVAC app seem to be the exact same app.
So, no worries if your instruction manual call it the SMARTHVAC app.


Next, I opened the app and chose the “Control your Air Conditioners from Anywere” option.

Then, I created a username and password.
Also, I kept this handy because it is needed when integrating the unit with Amazon Alexa.


Next, I clicked ‘sign up’ after entering the required information.


Once complete, the app took a few minutes to create my account.


The app prompted me to join the wifi network.
Essentially, this step configures the smart controller to join my home WiFi network.


Smart Controller App Configuration
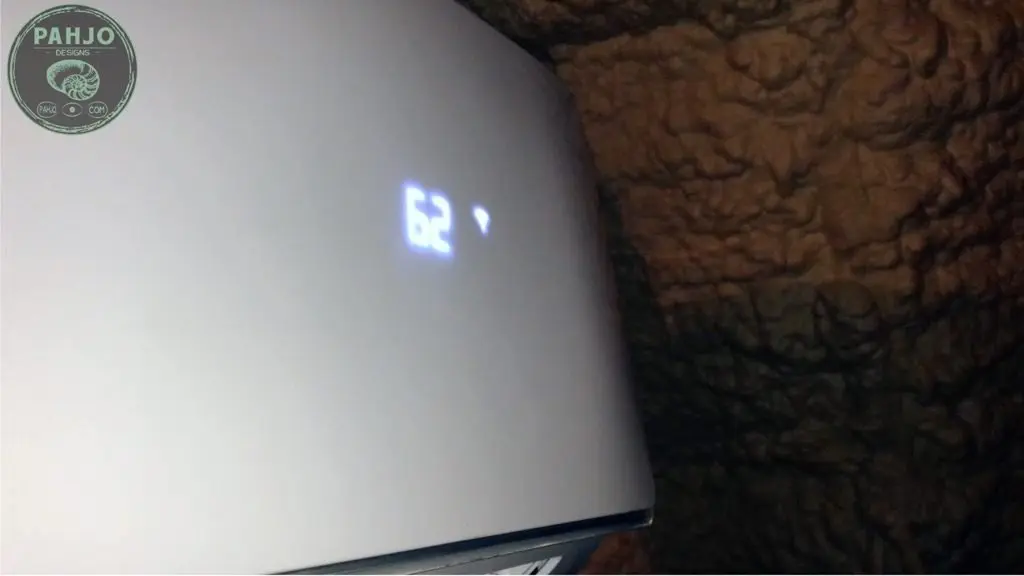
I named my device ‘attic mini split’ and chose ‘Fahrenheit’ as the type of air conditioner.

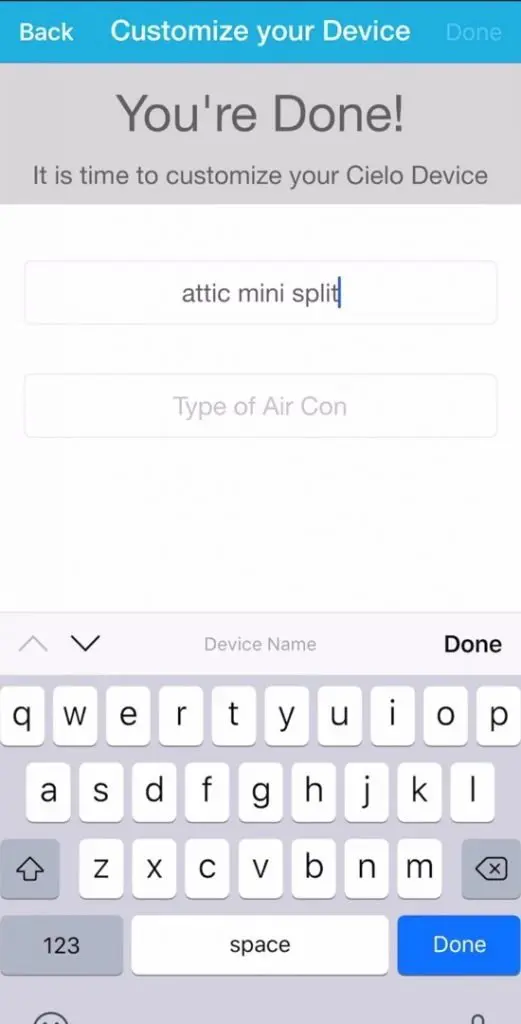
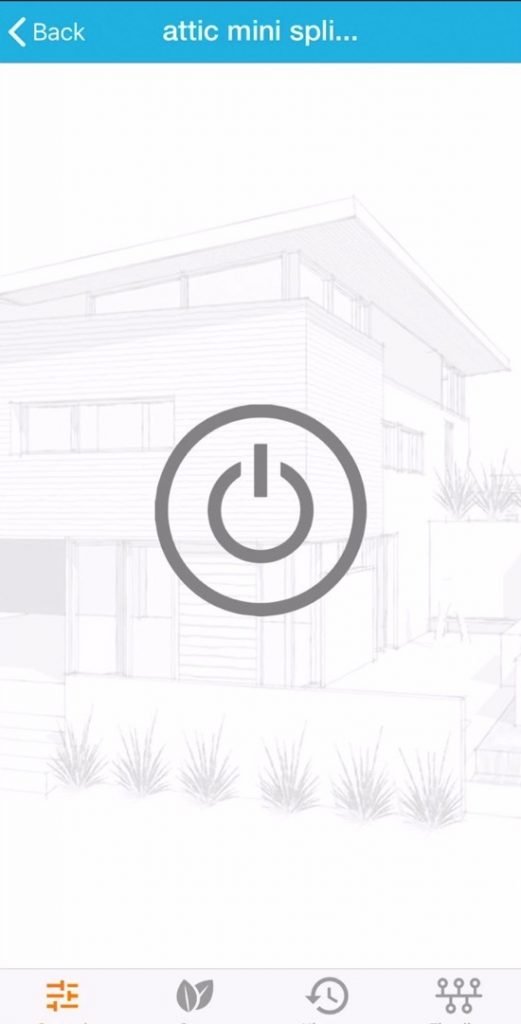
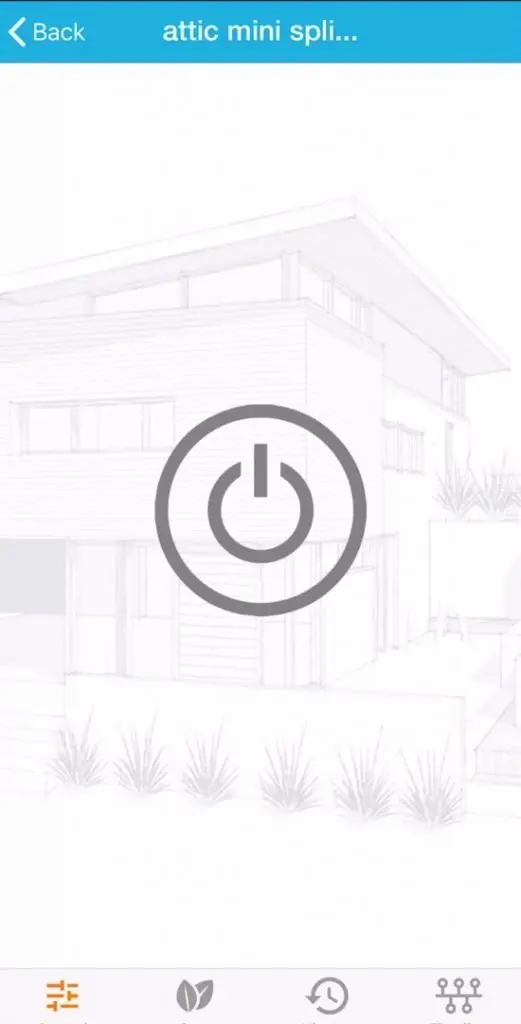
The picture below contains a picture of the home screen.
In order to control the unit, I simply clicked on the unit.


In addition, the app has many other features such as on/off schedules, historical reporting, cleaning reminders, and much more.
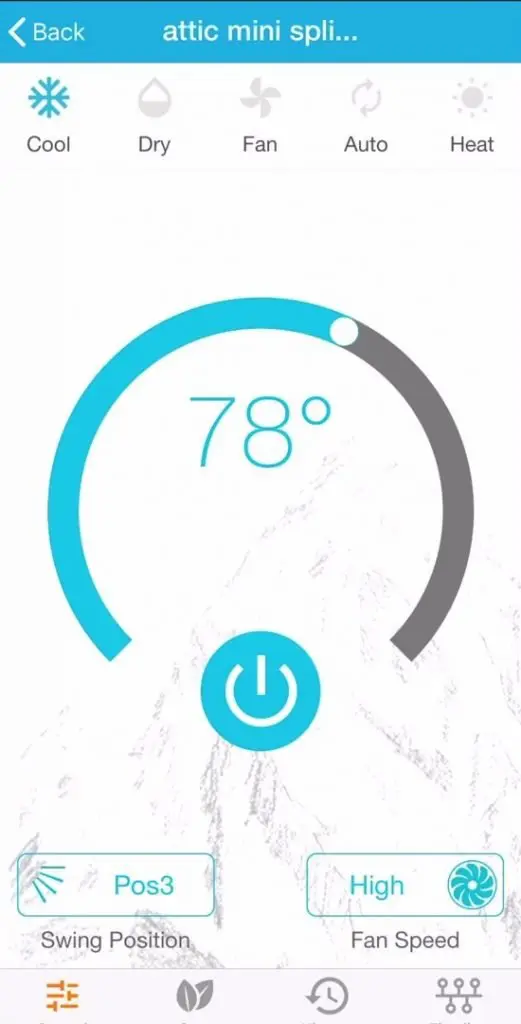
I turned the unit on and set my desired temperature on the cool setting.
Also, I verified the settings for fan speed and blower position.

Smart Controller Alexa Integration
As I mentioned, the DIY mini split HVAC smart controller integrates with Amazon Alexa & Google Home.
Since I have 2 Echo Dots, I chose to integrate the smart controller with Alexa to control my mini split with voice commands.
Also, third party smart home custom applications (such as IFTTT) are endless regarding automation.
I only cover the basic setup and functionality of this integration.
First, I opened the Alexa app on my smartphone. I already installed it in order to initially setup my echo dot.


Next, I clicked the option menu at the top left of the screen and selected ‘Skills & Games’.

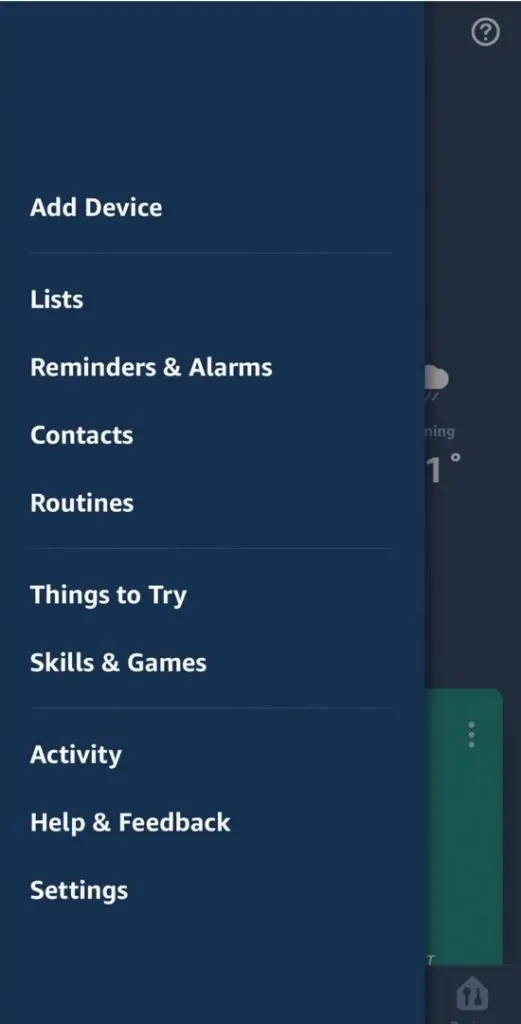
In the search box, I typed ‘cielo’ and chose ‘Cielo Smart Home’.
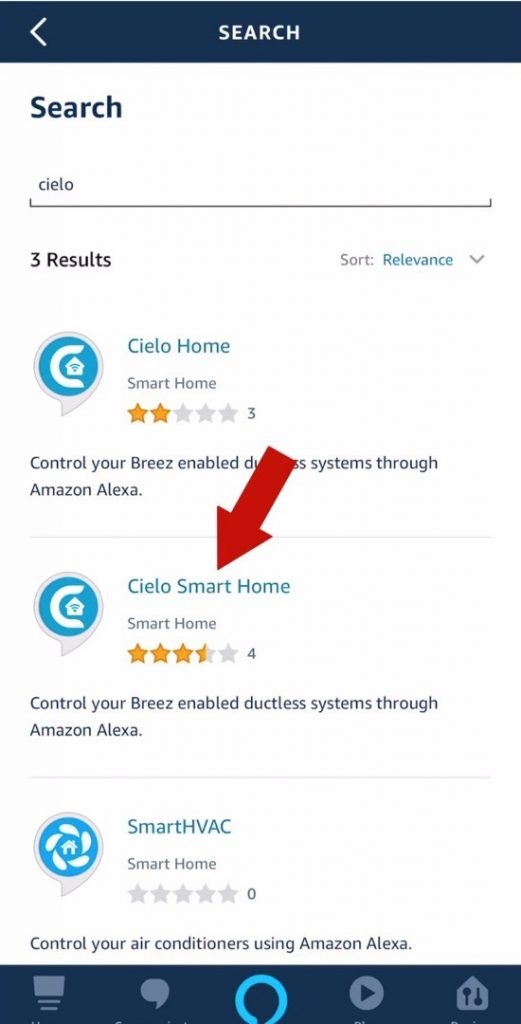

Next, I enabled the Cielo Smart Home app.


I entered my login credentials I created during the last step in the space provided.


Alexa informed me I successfully integrated my DIY mini split.


Per the recommendation of the app, I clicked ‘Discover Devices’.


After roughly 20 seconds, Alexa discovered my mini split smart controller.
Also, Alexa automatically categorized the controller as a thermostat.


Finally, I completed the integration between Alexa and my mini split smart controller.
In addition, Alexa provides you with sample voice commands to try out.


Essentially, everything worked and I started gathering temperature and humidity data.
DIY Mini Split Install in Spray Foam Attic Final Results
After I finished the installation, I started collecting data.
Keep in mind, I used the data from the humidity sensor near the roof of my attic. The temperature and RH are highest at this sensor.
Also, the information below represents 1:50 minutes from 1pm to 2:50pm on April 21, 2019.
I chose this time period as this is a very warm and humid part of the day.
As I mentioned in a previous section, I want to maintain an air temperature of 75 degrees or below.
In addition, I want to keep the relative humidity at 65% or below.
Essentially, these 2 measurements prevent mold in my climate zone.
Finally, the blue represents the Attic temperature and the orange bars represent the relative humidity.
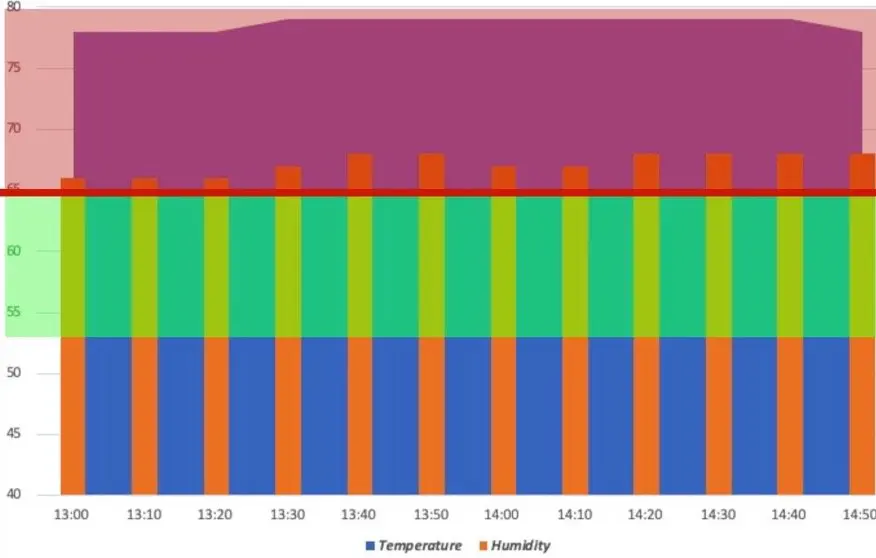
Results Without Humidity Control
Obviously, the temperature and relative humidity in my spray foam attic are not ideal as shown in the chart below.
Relative humidity rises above my threshold of 65% and the air temperature rises above 75 degrees.
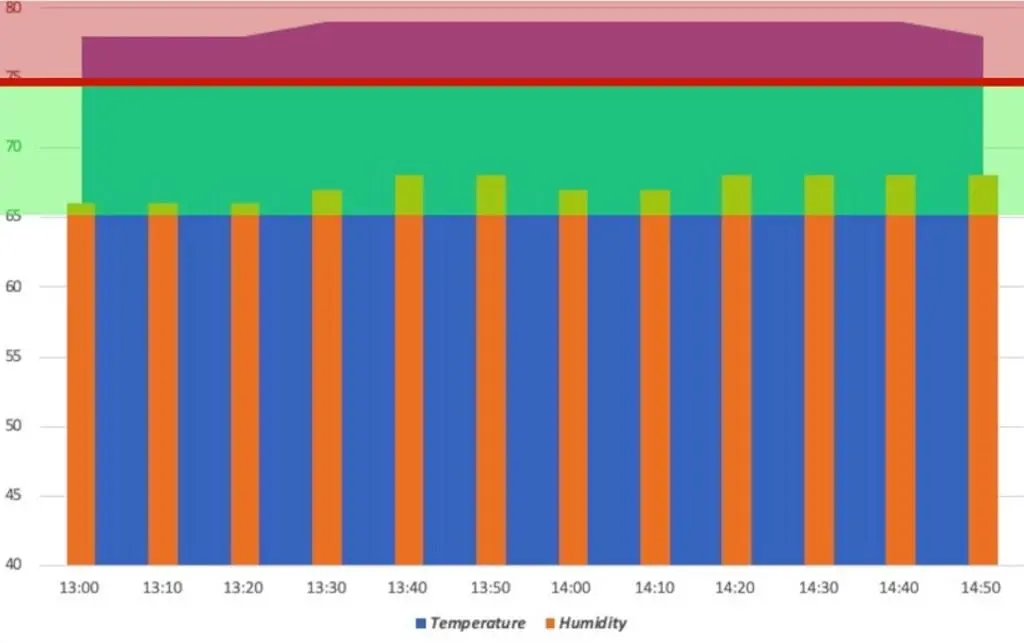
Results With Humidity Control
So, did my mini split reduce relative humidity to prevent moisture problems in a spray foam attic?
Well, I encourage you to read a bit more to find out.
Please note, the weather was the same during the 2 consecutive days I obtained this data.
First I set my DIY mini split via the Smart Controller app to turn on at 1pm and off at 2:50pm the following day.
Furthermore, I set the mini split to the ‘Cool’ mode with a set point of 75 degrees.
As you can see from the chart below, it took about 20 minutes for the relative humidity to begin to drop.
The RH continued to drop for 40 minutes from 1:20pm to 2:00pm.
As I expected, the temperature dropped to 75 degrees from 78 degrees and normalized.
In case you don’t know, the MRCOOL DIY mini split continues to run even after it reaches the desired temperature.
Therefore, I have to presume this explains why the humidity continued to drop even after the spray foam attic reached 75 degrees at 2:20pm.


Essentially, the mini split worked as intended by reducing RH from 67% to 50% during the 1:50 minute interval.
Furthermore, the temperature dropped 3 degrees while continuing to dehumidify the spray foam attic.
As time goes on, I’ll continue to fine tune the settings until I continuously maintain the ideal air temperature and relative humidity.
After about a week, I noticed the fans help the mini split reduce humidity and air temperature 20% faster.
Some folks believe fans provide no value b/c they just circulate the humidity around.
This is an accurate assessment in some cases without any mechanism in place to reduce humidity.
However, it is not true in my spray foam attic. Because my DIY mini split install conditions the attic air and removes moisture.
Mini Split Smart Home Automation
I used my humidity sensor, Samsung SmartThings controller, echo dot, and the mini split controller to automate the entire process.
First, the humidity and temperature sensor provide readings to the SmartThings controller.
Next, my SmartThings controller receives this information.
As a quick note, I completed the Alexa and Samsung Smartthings integration in a previous project.
In turn, Alexa is integrated with my smartthings controller and my DIY mini split smart controller.
So, I created an automation to turn on the MRCOOL DIY mini split and attic fans if both of the following conditions are met:
- the RH exceeds 65%
- the temperature exceeds 75 degrees.
Conclusion
In conclusion, I hope this DIY mini split install in spray foam attic project provided you with value.
Also, don’t forget to checkout my MRCOOL DIY mini split installation for my workshop.
In addition, checkout how I filed a warranty claim and fixed my mini split that stopped cooling.


ray
Wednesday 10th of July 2019
How did you trigger the fans to only run when the minisplit comes on?